
Photo by https://analoguewonderland.co.uk/
Key Takeaways
Polarizing filters can dramatically enhance the vibrancy and contrast in your photos, especially under bright light conditions.
It’s important to choose the right polarizing filter for your camera lens to ensure the best results.
Properly adjusting a polarizing filter can significantly reduce glare and reflections, deepening the intensity of blue skies and water bodies.
There are specific scenarios where a polarizing filter is most effective, and knowing when to use one can elevate your photography.
While polarizing filters can darken your photos, understanding how to manage exposure can counteract this effect.
|
Pro’s |
Con’s |
|---|---|
|
Protect Your Lens |
Over Polarizing |
|
When taking Pictures of Water |
Focus Errors |
|
Recover Skies |
Doesn’t Shine in Low Light Photography |
|
Cuts Reflection |
Read more about pro’s and con’s here https://sleeklens.com/blog/photography-accessories/pros-cons-of-polarizing-filters/
Understanding Polarizing Filters
Imagine you’re outside on a sunny day, and the light is bouncing off every surface. Some of that light will reflect in a way that creates glare, which can be distracting and can flatten the depth in your photos. A polarizing filter is like a set of blinds for your camera, allowing you to control which light rays enter your lens. It’s a thin piece of film that, when rotated, aligns its molecules in a way that blocks out certain angles of light.
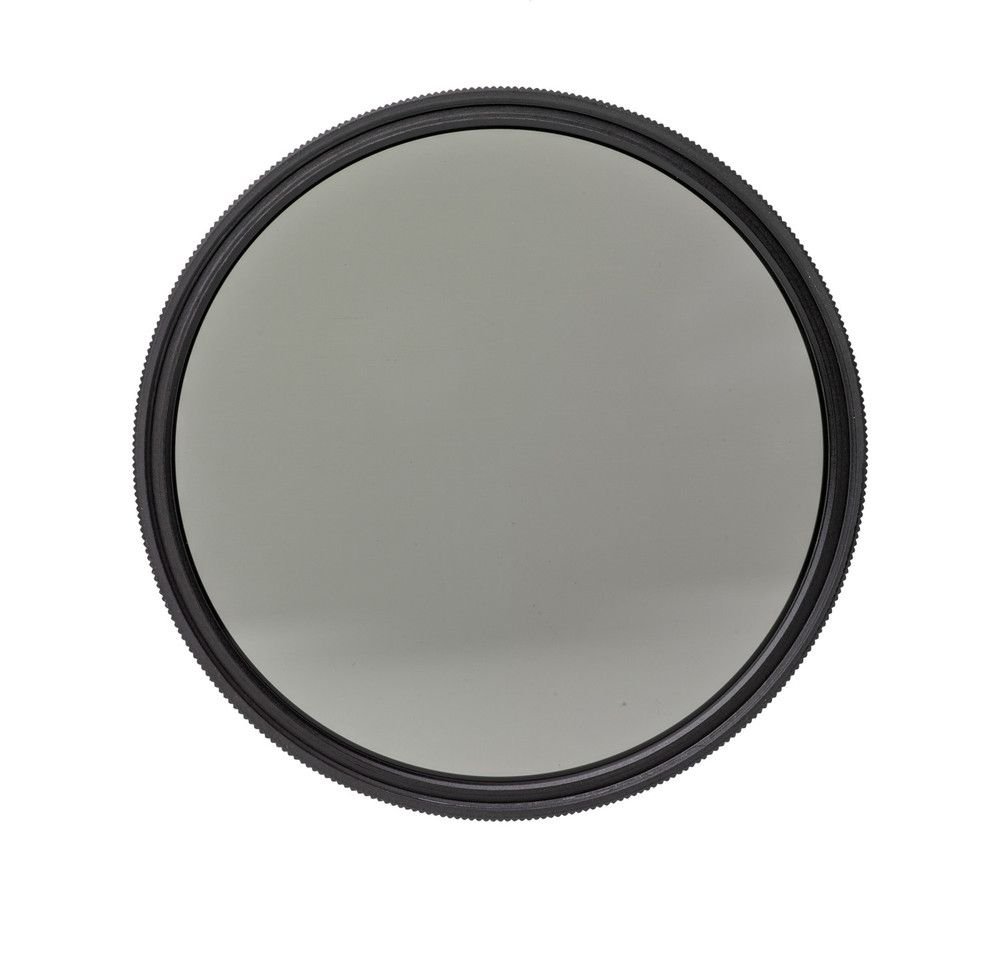
There are two types of polarizing filters: linear and circular. Despite the names, they’re both circular in shape! The difference lies in how they interact with the camera’s metering and autofocus systems. For film photography, linear polarizers are your go-to as they’re more straightforward and tend to be less expensive.
Choosing the Right Polarizing Filter
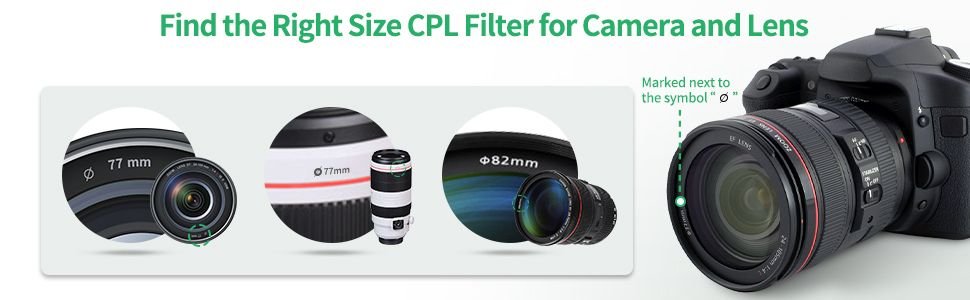
Before you rush out to buy a polarizing filter, you need to know what size fits your lens. Look at the front of your lens; there should be a number with a ‘ø’ symbol. That’s your filter size. Now, when you’re picking a filter, consider the following:
Material: High-quality glass filters are preferable over plastic as they are more durable and offer better clarity.
Coating: Multi-coated filters can reduce the amount of light that’s reflected off the filter itself, ensuring more light reaches your film.
Thickness: Slim filters help to avoid vignetting on wide-angle lenses, but they might not have threads for lens caps.
Remember, the quality of your filter can affect the image. A poor-quality filter might introduce unwanted color casts or reduce the sharpness of your image. The prices vary from $5 to $500 if not higher. Spending between $40 on a polarizer is more than enough. It’s worth investing in a good one.
When to Reach for Your Polarizing Filter
Polarizing filters excel in bright outdoor conditions. When the sun is high, and light scatters across the sky and landscape, a polarizing filter can cut through the haze and glare, delivering crisp images with rich colors and deep blue skies.
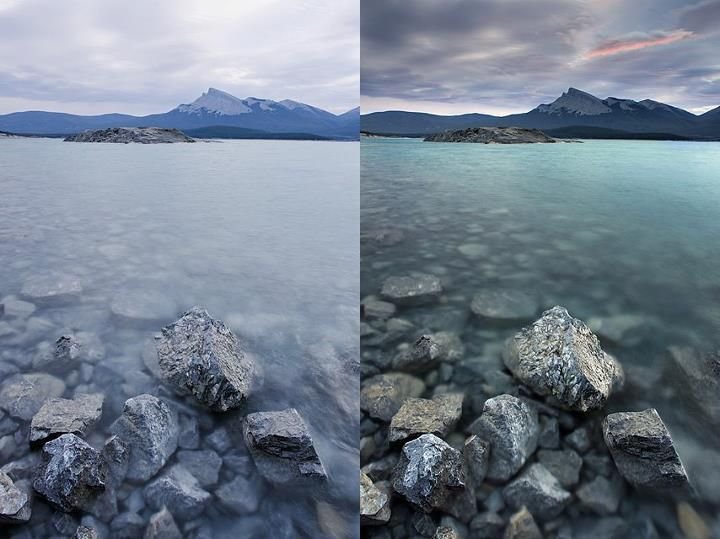
Photo by https://neiloseman.com/
Enhancing Skies and Water Bodies
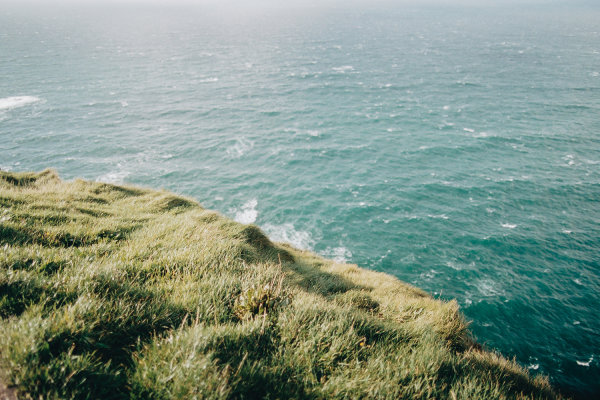
If you’re aiming to capture the vastness of the sky or the serene beauty of a lake, a polarizing filter should be your first choice. By rotating the filter while looking through your viewfinder, you can watch as the sky becomes a more intense blue, and clouds gain definition, popping against the background. Similarly, for water bodies, the filter can reduce the reflections on the surface, providing a glimpse into the clear water below, often revealing details that would otherwise be obscured by glare.
Suppressing Glare and Reflections
Glare can be a photographer’s nemesis, especially when shooting surfaces like glass, foliage, or painted objects. A polarizing filter can suppress these reflections, allowing the true colors and textures to shine through. It’s like peeling back a layer to reveal the scene as it is, without the bright distractions of reflected light.
Troubleshooting Common Polarizing Filter Challenges
While polarizing filters can work wonders, they’re not without their challenges. Sometimes, you might notice that your images aren’t turning out quite right. Don’t worry, though; these issues can often be resolved with a few simple adjustments.
One common issue is a loss of light. Since polarizing filters block certain rays, they can reduce the amount of light entering your lens by up to two stops. This means you’ll need to compensate by either opening your aperture, slowing down the shutter speed, or using a higher ISO.

Photo by https://topshopping.top/
Dealing with Vignetting and Lens Flare
Vignetting, or the darkening of the corners of your image, can occur if your polarizing filter is too thick or if you’re using a wide-angle lens. To prevent this, opt for a slim polarizing filter, and be mindful of the filter’s edge when composing your shot. As for lens flare, it can be an issue when shooting into the light. A lens hood can be an invaluable accessory here, helping to block out unwanted light that can cause flare.
Managing Exposure Changes
Because polarizing filters reduce the light reaching your film, you might need to adjust your exposure to compensate. Here’s a simple rule of thumb: if your filter reduces light by two stops, you’ll want to either double your exposure time or open up your aperture by two stops (for example, from f/4 to f/2). This will ensure your film receives enough light to capture the scene properly.
Creative Explorations: Getting Artistic with Polarizers
Aside from their practical applications, polarizing filters can be used to add a creative edge to your photography. By manipulating reflections and experimenting with different angles, you can create images that are truly unique.
Experimenting with Reflections and Angles
Reflections can be used creatively to add depth and interest to your photographs. With a polarizing filter, you can choose just how much reflection you want to show. For instance, you might want to capture the reflection of autumn leaves on a still lake, but also want to see into the depths of the water. By adjusting the filter, you can find the perfect balance that captures both the reflected scene and the world beneath the surface.
Angles play a significant role in the effectiveness of a polarizing filter. The filter is most effective when the sun is at a 90-degree angle to your lens. So, if the sun is directly overhead or behind you, you won’t see much of an effect. Keep this in mind as you compose your shots and be prepared to move around to find the sweet spot.
Watch YouTube video here ← ”Using my Circular Polarizer Filter for Film Photography”
On a bright autumn day, I wanted to photograph a forest scene with a small pond. Without the filter, the glare on the water’s surface was overwhelming. By attaching a polarizing filter and rotating it until the reflections dimmed, I captured the vibrant red and orange leaves both above and within the water, creating a layered and captivating image.
Combining filters can lead to even more creative outcomes. For instance, pairing a polarizing filter with a neutral density filter can allow for long exposures in bright conditions, giving you the silky water effect in a waterfall shot, while also keeping the colors rich and glare-free.
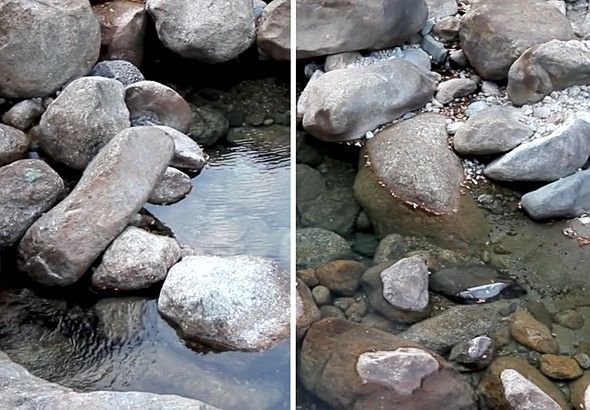
Photo by https://www.dpreview.com/
Combining Filters for Unique Results
While a polarizing filter can be a powerful tool on its own, combining it with other filters can open up a world of possibilities. For example, using a polarizer with a graduated neutral density filter can help balance the exposure between a bright sky and a darker landscape, all while removing glare and enhancing colors.
Always remember that the more filters you stack, the more light you block from reaching your film. This means you’ll need to make further adjustments to your exposure settings. It’s a balancing act, but when done correctly, the results can be stunning.
Remember, practice makes perfect. Don’t be afraid to experiment with your polarizing filter in different lighting conditions and with various subjects. The more you use it, the more intuitive it will become to achieve the effects you desire.
Make sure the polarizing filter fits the thread size of your camera lens.
Adjust the filter while looking through the viewfinder to see the effect in real-time.
Be aware of the light reduction caused by the filter and adjust your exposure accordingly.
Use a lens hood to minimize lens flare when shooting towards the light.
Experiment with combining polarizing filters with other types of filters for unique effects.
FAQs
Why are my images darker after using a polarizing filter?
Polarizing filters naturally reduce the amount of light entering your lens, which can make your images appear darker. This is why it’s important to compensate by adjusting your camera settings. You may need to use a slower shutter speed, a larger aperture, or a higher ISO to allow more light to reach the film.
Can I use a polarizing filter for indoor photography?
While polarizing filters are primarily used for outdoor photography to manage reflections and glare from natural light sources, you can still use them indoors. If you have strong reflections from windows or shiny surfaces, a polarizing filter can help reduce them. However, be mindful of the reduced light and adjust your camera settings accordingly.
Indoor lighting often doesn’t provide the same conditions as the sun, so the filter’s effect may be less pronounced. It’s all about finding the right angle and light source for the filter to make a noticeable difference.
And remember, a polarizing filter won’t be as effective with artificial light sources as it is with the sun because the light waves from artificial sources are not as uniformly polarized.
Does a polarizing filter affect the film’s ISO sensitivity?
No, a polarizing filter does not change the ISO sensitivity of your film. ISO is an inherent characteristic of the film itself. However, because a polarizing filter reduces the light reaching the film, you may need to adjust your exposure settings as if you were using a film with a lower ISO rating. This means either opening up your aperture, slowing down the shutter speed, or both.
Consider this: if you’re using ISO 400 film and your polarizing filter reduces light by two stops, you’ll need to expose as if you were using ISO 100 film to compensate for the loss of light.
Always keep an eye on your light meter and bracket your exposures when possible to ensure you capture the image just as you envision it.
In conclusion, polarizing filters can open up a new dimension in your film photography, giving you control over elements that you can’t adjust in post-processing. With the right approach and a bit of practice, you’ll be able to enhance the natural beauty of your scenes, control reflections, and create images with depth and drama. Embrace the learning curve and enjoy the process of refining your craft. Happy shooting!
Using a polarizing filter can significantly enhance the quality of your film photography. It can reduce reflections from water and glass, deepen the blue of the sky, and increase color saturation. For landscape photography, especially in bright outdoor conditions, a polarizing filter can be an invaluable tool to improve the overall appearance of your images.


Leave a Reply