
Key Takeaways
Aperture controls the amount of light entering your camera and impacts depth of field.
Depth of field influences how much of your photo is in sharp focus.
Shutter speed determines the duration the camera’s sensor is exposed to light, affecting motion blur.
Balancing aperture, depth of field, and shutter speed is crucial for achieving the perfect exposure.
Understanding these settings empowers you to take control of your photographic vision.
The Magic Trio: Aperture, Depth of Field, Shutter Speed
There are three pillars in film photography that work in unison to create the perfect image: aperture, depth of field, and shutter speed. Think of them as the ingredients in a recipe, each one essential to the final taste. When you understand how to balance these settings, you’ll have the recipe for photographic success.
Aperture: Painting with Light

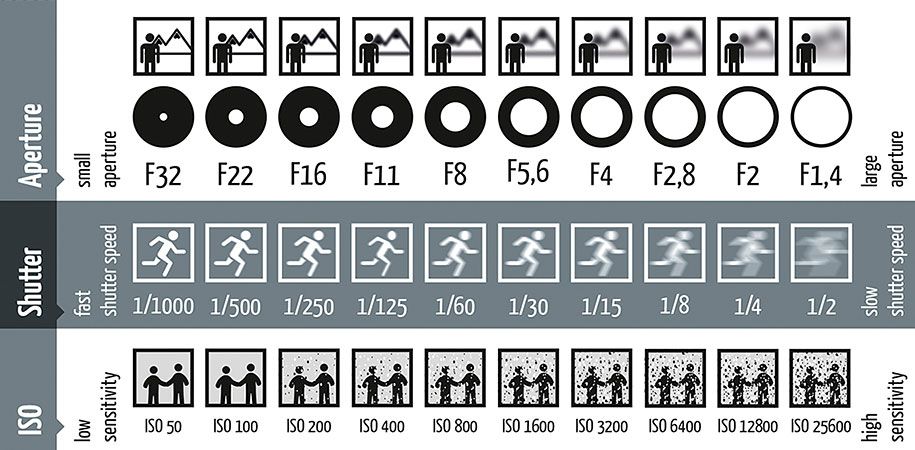
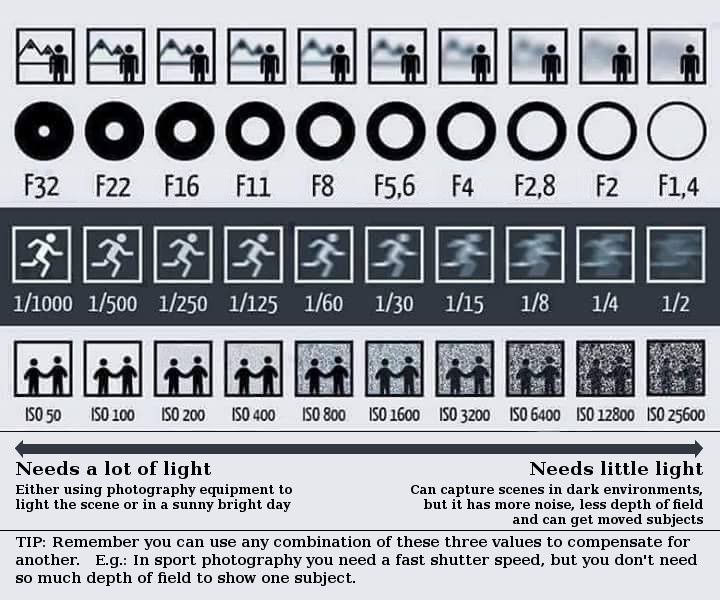
Aperture is the opening in your lens that lets light into your camera. It’s the pupil of your camera’s eye, dilating and contracting to control the light’s intensity. This setting is measured in f-stops, such as f/1.4, f/2.8, or f/16. But remember, the lower the number, the wider the aperture and the more light that enters.
Defining Aperture: Your Lens’ Eye
Think of aperture as a window. The larger you open it, the more light streams in. In a dimly lit room, you’d open the window wide. But on a bright day, you might only need to crack it open. Your camera’s aperture works the same way. It’s all about controlling the amount of light that hits your film.
Common Aperture Settings and Their Effects
Aperture affects not only the light but also the depth of field. This is the extent of your scene that appears sharp. Here’s a simple guide to common aperture settings:
f/1.4 – f/2: Great for low light and a shallow depth of field that makes your subject stand out with a creamy, blurred background.
f/2.8 – f/4: Ideal for portraits, maintaining focus on your subject while gently softening the background.
f/5.6 – f/8: The sweet spot for most lenses, offering a balance between light and sharpness for everyday shots.
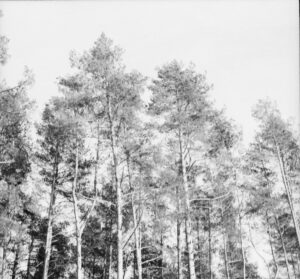
f/11 – f/16: Perfect for landscapes, these settings ensure a deep depth of field, keeping everything from the foreground to the horizon in focus.
Choosing the Right Aperture for Your Subject
When you’re looking through your viewfinder, ask yourself, “What’s the star of this scene?” If it’s a person’s face, a wide aperture like f/2 might be your best choice. But if you’re capturing a sprawling landscape, a smaller aperture, say f/16, will keep the vast scene in focus.
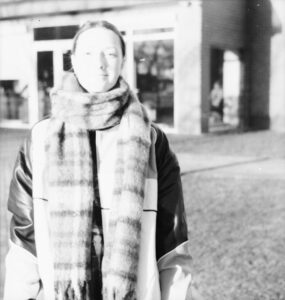
For example, when photographing a friend in a cafe, I might choose an aperture of f/2.8. This setting will keep my friend sharply in focus while blurring the background, making my subject the undeniable focal point of the image.
Depth of Field: Crafting the Focus
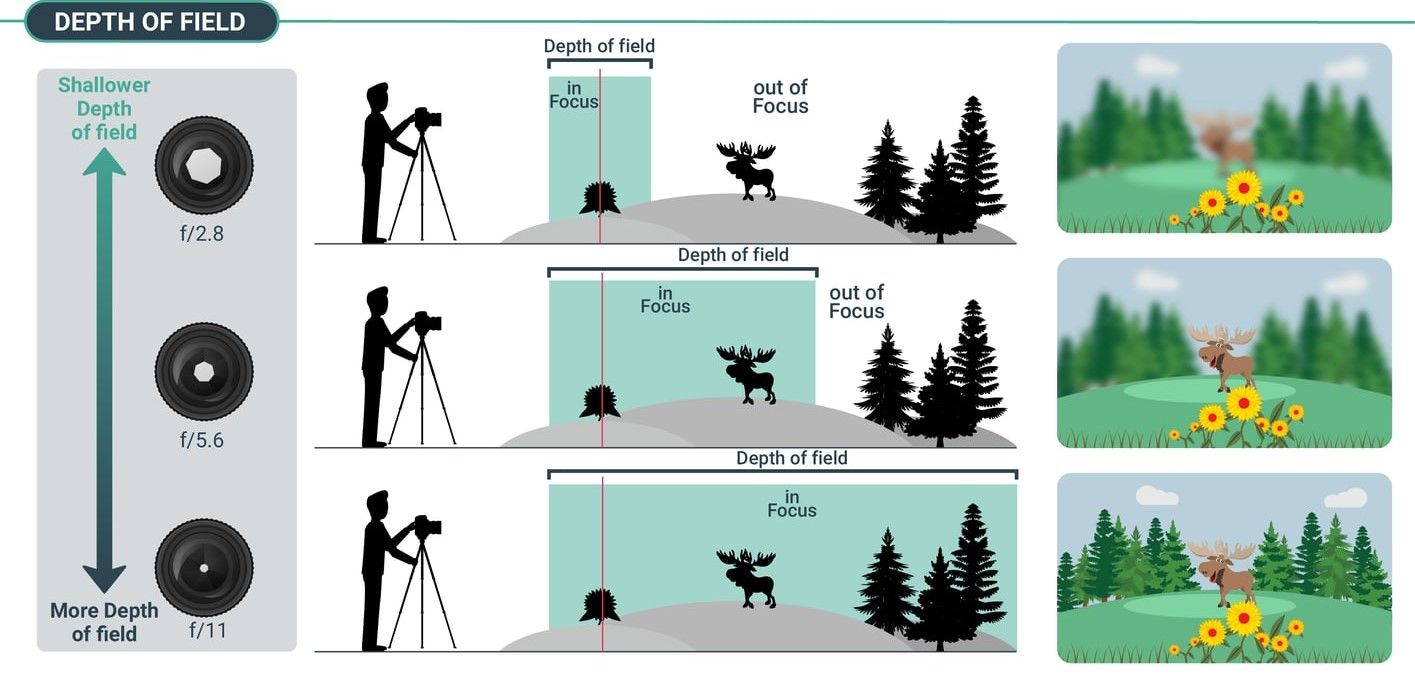
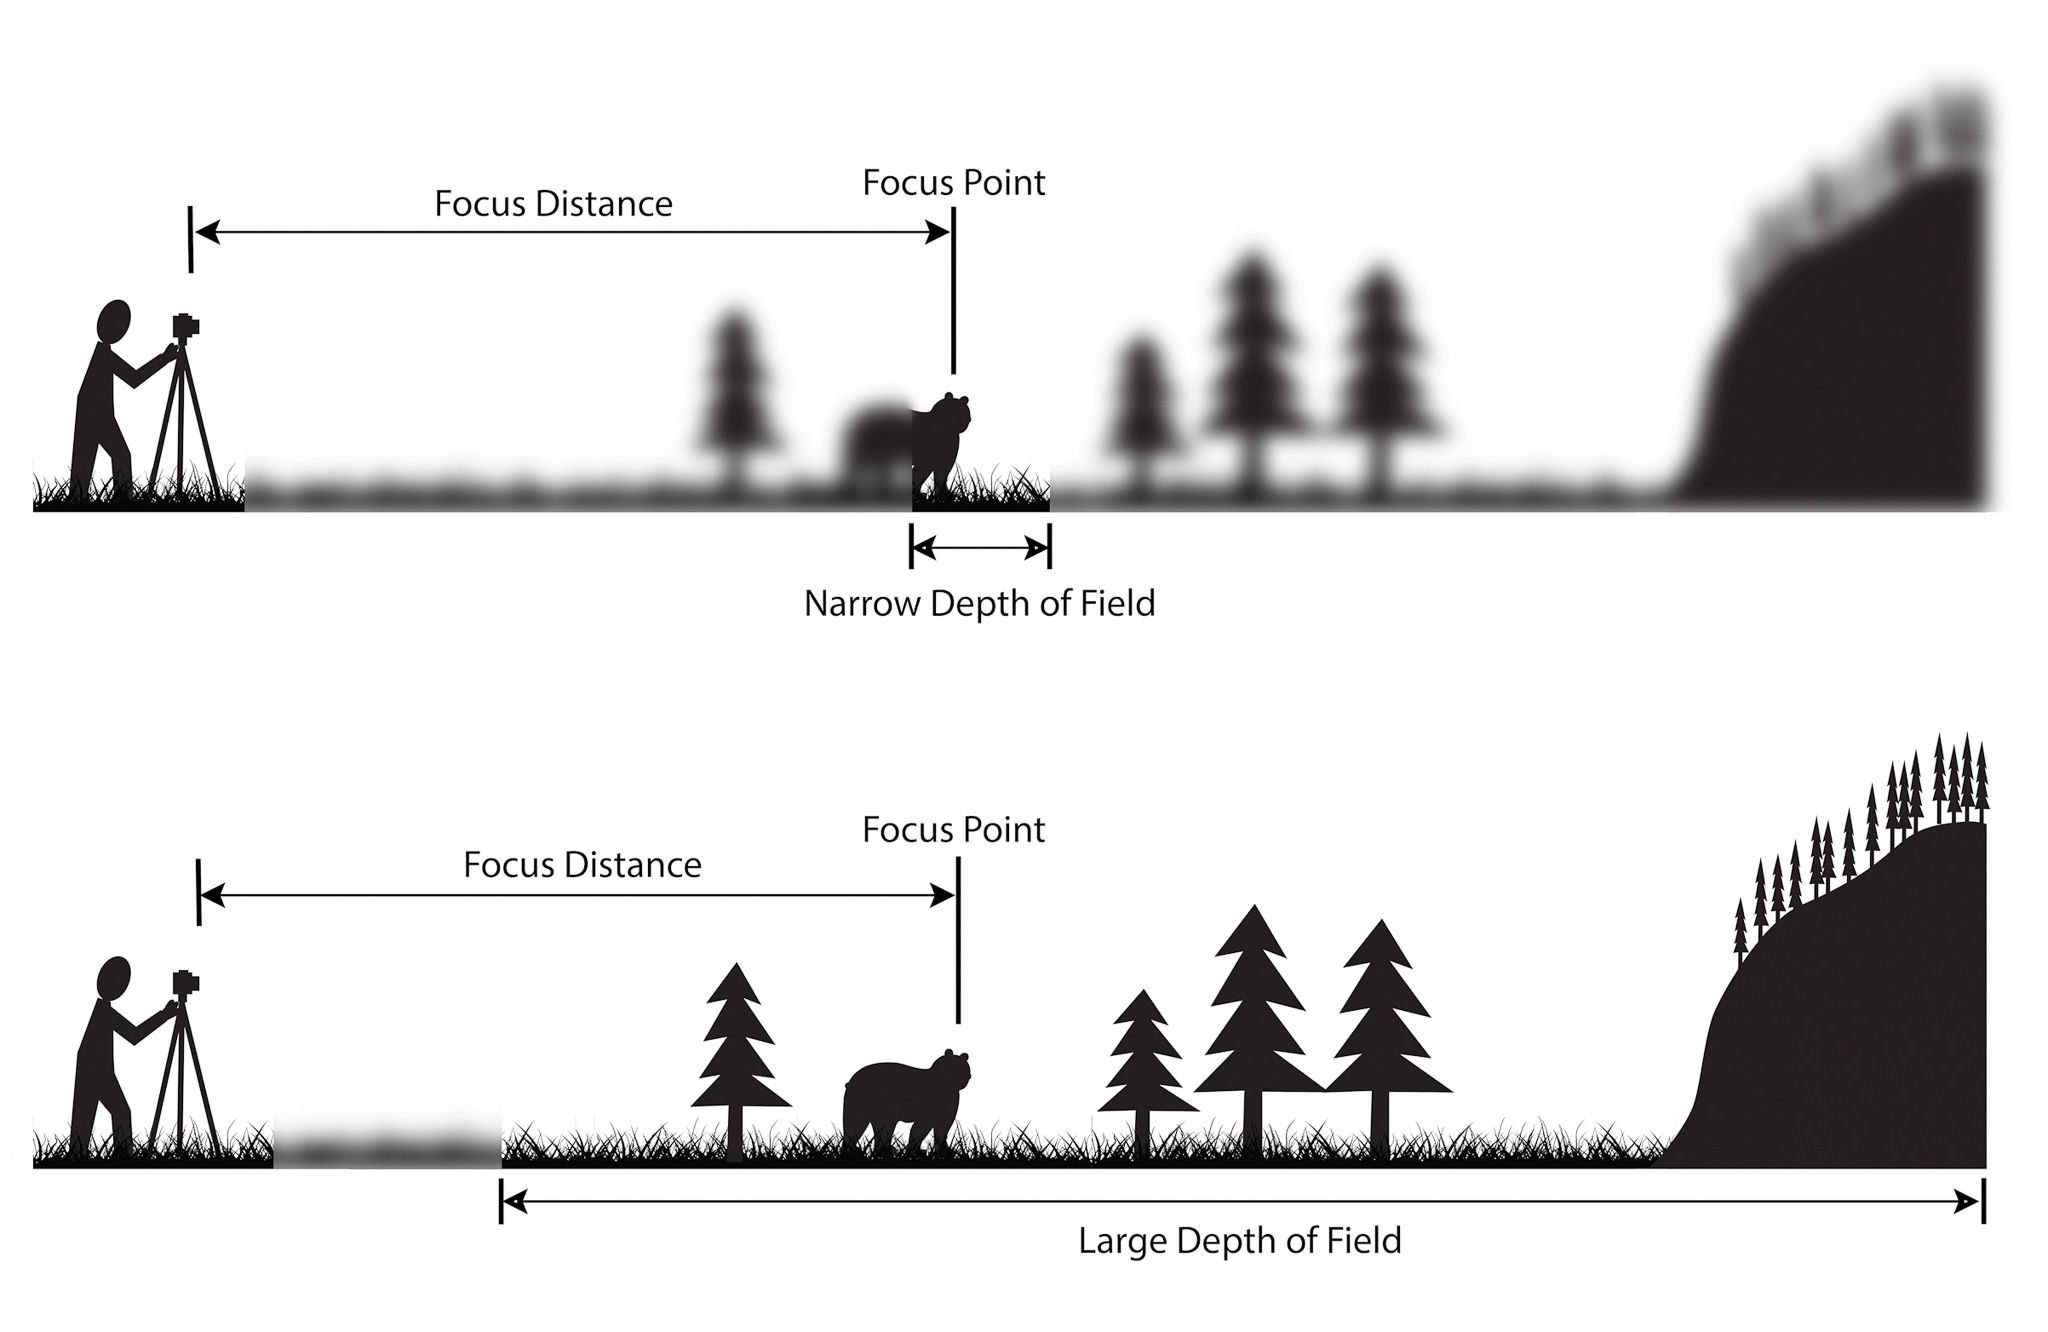
Depth of field (DOF). It determines which part of your photograph is in focus and which parts are artistically blurred. It’s a powerful tool to draw the viewer’s eye exactly where you want it. Whether you’re capturing a portrait or a mountain range, depth of field helps communicate your vision.
Understanding Depth of Field in Composition
Depth of field is influenced by three main factors: aperture, the distance from the subject, and the focal length of the lens. A wide aperture (a low f-stop number) creates a shallow depth of field, beautifully blurring the background and focusing on your subject. Conversely, a small aperture (a high f-stop number) broadens the depth of field, keeping more of the scene in sharp focus.
The distance between you and your subject also plays a role. The closer you are to your subject, the shallower the depth of field. Similarly, the focal length of your lens can affect DOF. Longer lenses compress the scene and typically produce a shallower depth of field compared to wide-angle lenses.
Techniques to Control Depth of Field: From Portraits to Landscapes
Here’s how you can harness depth of field to elevate your photography:
For intimate portraits, open up your aperture to create a shallow depth of field. This keeps your subject in focus while the background fades into a soft blur.
When capturing landscapes, close down the aperture to keep the entire scene in sharp detail.
Experiment with distance. Moving closer or further from your subject can significantly affect the depth of field.
And don’t forget, the choice of lens can make a big difference. A longer lens can help isolate your subject, while a wide-angle lens can help capture expansive scenes with everything in focus.
For example, consider a field of wildflowers. Using a wide aperture like f/2.8 with a close-up shot will isolate a single flower, making it stand out against a dreamy background. But step back and narrow the aperture to f/16, and you’ll capture the entire field in crisp detail.
Shutter Speed: Freezing Time with Your Camera

Shutter speed is the heartbeat of your camera. It’s the amount of time your camera’s shutter is open to expose film to light. Fast shutter speeds can freeze motion, perfect for capturing a sprinter in full stride. Slow shutter speeds, on the other hand, can blur motion, conveying movement in a waterfall or bustling city street.
Fast Shutter Speeds (1/500s or faster): Ideal for freezing action and reducing motion blur.
Slow Shutter Speeds (1/60s or slower): Great for creating motion blur or shooting in low light with a tripod.
The right shutter speed can infuse life into your photographs, whether it’s the stillness of a frozen moment or the dynamism of motion.
Slow Versus Fast: Shutter Speed Explained
A fast shutter speed is like a blink that captures an instant, while a slow shutter speed is like a prolonged gaze that observes the passage of time. Choosing between the two depends on what you want to express. Fast shutter speeds will give you sharp images of fast-moving subjects, while slow shutter speeds are perfect for creating a sense of motion or shooting in dim conditions.
Shutter Speed in Action: Creating Motion and Stillness
To demonstrate the power of shutter speed, imagine photographing a bustling city intersection. A fast shutter speed, such as 1/1000s, will freeze the cars and pedestrians in place, capturing a slice of urban life. But use a slow shutter speed, like 1/15s, and the scene transforms. Cars become streaks of light, and pedestrians blur into ghostly figures, conveying the city’s energy and movement.
Here’s a real-world example: photographing a child on a swing. Set your shutter speed to 1/500s, and you’ll freeze the child mid-air, their joy captured forever. But if you choose a slower shutter speed, say 1/30s, you’ll get a beautiful blur that evokes the motion of swinging.
The Synergy: Balancing Aperture, Depth of Field, and Shutter Speed
Now that we’ve explored the individual elements, let’s talk about how they work together. Balancing aperture, depth of field, and shutter speed is key to achieving the perfect exposure. It’s like mixing colors on a palette to paint the perfect picture.
Adjusting one setting will often require a change in another to maintain the right exposure. For instance, if you open up the aperture for a shallower depth of field, you may need to speed up the shutter to prevent overexposure. This interplay is what makes film photography an art.
Understanding the relationship between these settings will give you the confidence to take control of your camera and create the images you’ve always imagined. And with practice, adjusting these settings will become second nature, allowing you to focus on capturing the world through your unique perspective.
My beginners journey
As a beginner, I initially lacked knowledge about the optimal camera settings for capturing the best shots. My first experience with a film roll was essentially an experiment, relying on intuition. Surprisingly, upon developing the roll, I found that most of the photos turned out better than expected. This highlighted the forgiving nature of cameras, particularly when using Black & White film.
Don’t let the idea of mastering these skills all at once discourage you. Progress takes time, so start by practicing on simpler subjects like a flower in your garden where the pressure isn’t as high. Before embarking on a photography trip to breathtaking destinations, hone your skills at home to avoid the disappointment of capturing a completely black or blurry shot of the Eiffel Tower.
To enhance my learning process, I meticulously recorded the settings used for each photo, allowing for a detailed analysis post-development. I had a great opportunity to study every shot.
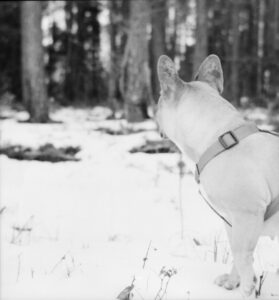
You can see my very first beginner photos right here
FAQ
What is the best aperture setting for portraits?
For portraits, you’ll often want to use an aperture between f/2 and f/4 to achieve a shallow depth of field. This blurs the background and makes your subject stand out. The exact setting can depend on your lens and how much of the background you want to blur, but this range is a good starting point.
How do I achieve a blurry background in my photos?
To achieve a blurry background, or ‘bokeh‘, use a wide aperture (low f-stop number). This reduces the depth of field, focusing sharply on your subject and blurring everything else. Pair this with a longer focal length lens and position your subject further from the background for the best effect.
What shutter speed should I use for sports photography?
For sports photography, you’ll want to freeze the action. Start with a shutter speed of at least 1/500s. If the subjects are moving very quickly, like in motor racing, you may need to go even faster, up to 1/2000s or more. Always be prepared to adjust based on the lighting conditions and the speed of your subject.
Because lighting conditions can change rapidly during sports events, especially if they span from day to evening, it’s essential to be ready to adjust your settings as needed to maintain proper exposure and freeze the action.
Can I use a slow shutter speed without a tripod?
Yes, you can use a slow shutter speed without a tripod, but it’s challenging. To minimize camera shake, use the rule of thumb that your shutter speed should not be slower than the reciprocal of your lens’s focal length. For example, with a 50mm lens, try not to go below 1/50s. Holding your breath and bracing your arms can also help steady the shot. If you’re interested in learning more about stabilizing techniques and camera handling, consider exploring this guide on folding camera focus techniques.
How does ISO affect my aperture and shutter speed settings?
ISO measures the sensitivity of your film to light. A higher ISO can compensate for lower light, allowing you to use a faster shutter speed or smaller aperture. However, a higher ISO also introduces more grain into your images. It’s a balancing act: you’ll need to decide the trade-off between light sensitivity and image quality based on your specific shooting conditions.


Leave a Reply