

To develop color film at home, you need C41 film, a dark room or changing bag, a developing tank, and specific chemicals.
Mixing and handling chemicals safely is crucial, as C41 development chemicals are corrosive and require careful disposal.
Temperature and timing are key factors in the film development process, with typical development taking around 3.5 minutes at 102°F.
After development, the film must be rinsed and fixed to remove unexposed silver halide crystals and stabilize the image.
Proper drying and storing techniques will ensure the longevity of your negatives and the quality of your photographs.
Choosing the Right Film: Understanding C41
First things first, ensure the film you’re using is compatible with the C41 process. Most color negative films available today are C41 type, so this shouldn’t be a problem. The packaging should clearly state ‘C41’ which indicates the chemical process used for developing that particular film.
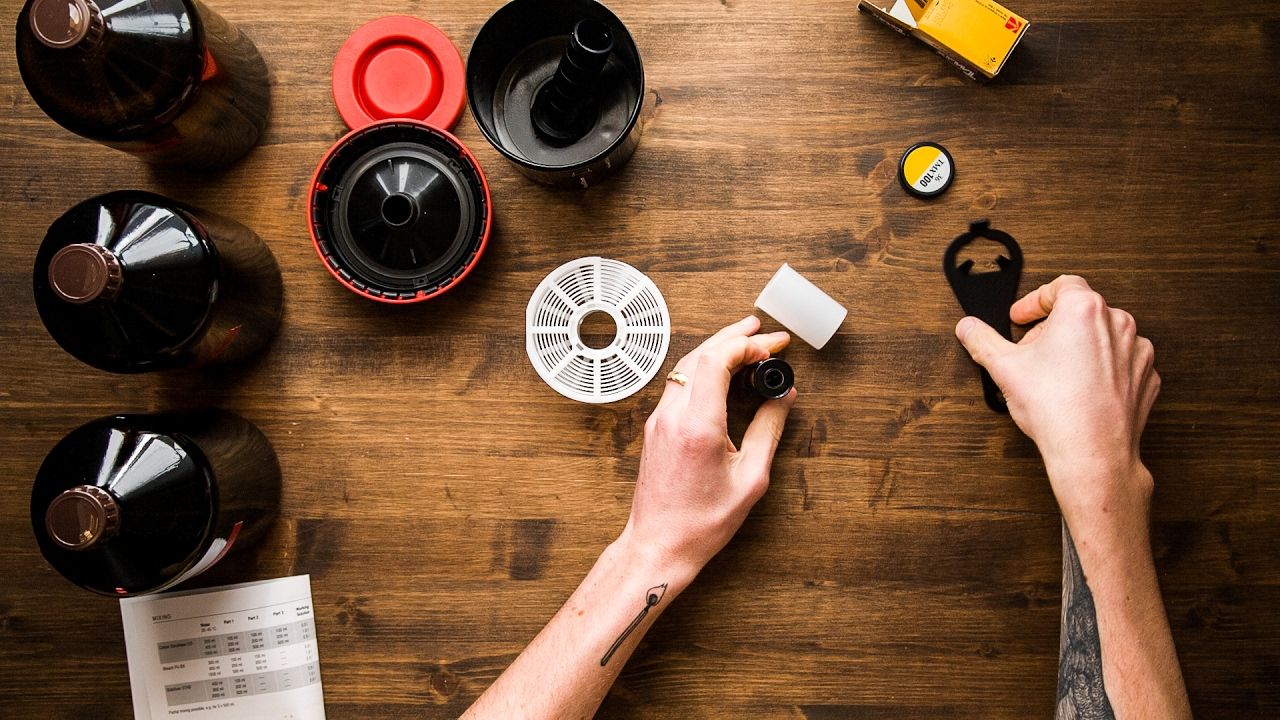
Tools of the Trade: Equipment Checklist
Before diving into the process, you’ll need to assemble your toolkit. Here’s what you should have:
A changing bag or a completely dark room to load film into the developing tank without exposing it to light.

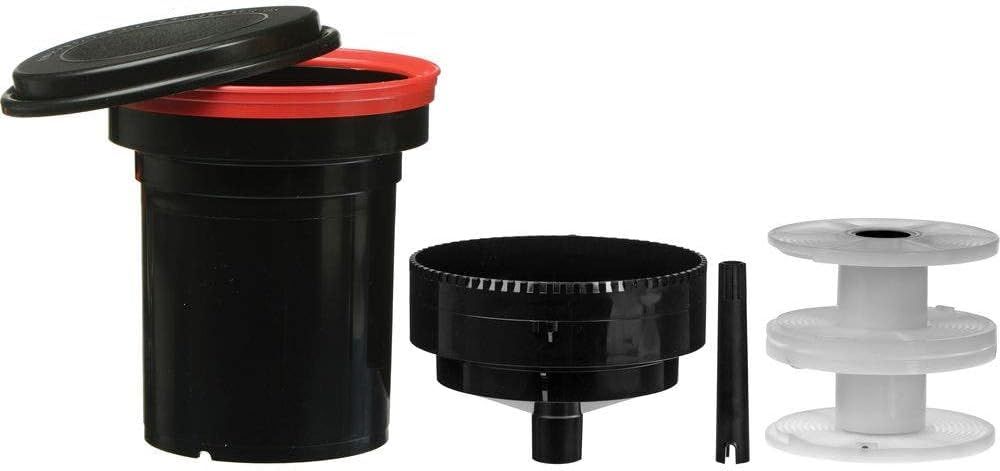
A developing tank and reels that fit your film format (35mm, 120, etc.).
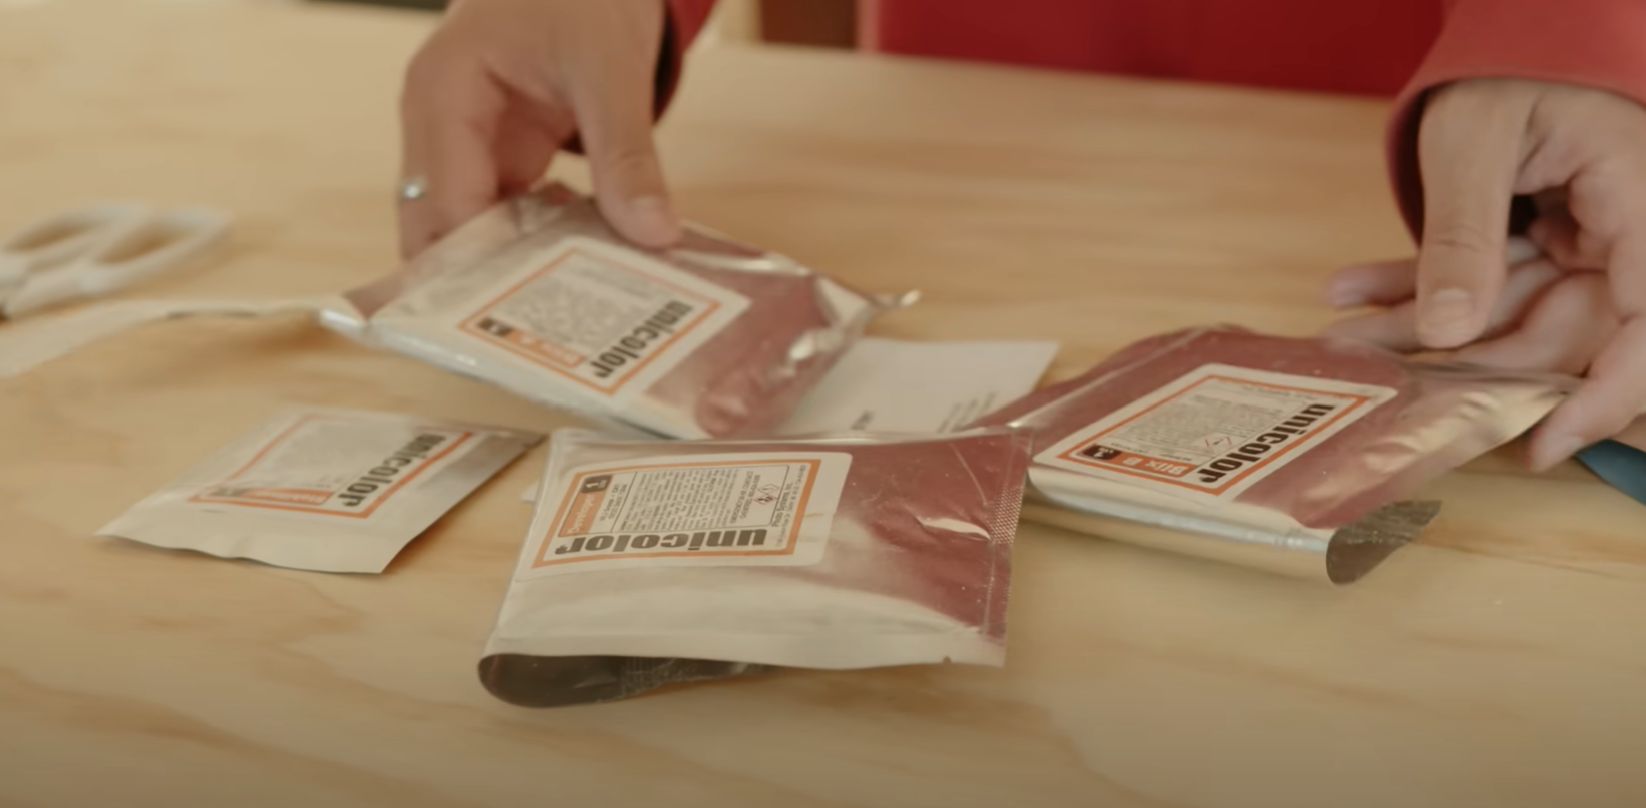
Chemicals for developing C41 film, which can be purchased in powder or liquid form. Kits usually include developer, blix (bleach-fix), and sometimes a stabilizer bath.
Thermometer to accurately measure the temperature of your chemicals.
Storage bottles, preferably those designed to minimize air exposure and prolong the life of mixed chemicals.
Mixing It Up: Preparing Your Chemicals Safely
If you got chemicals in powder form, you can simply read the instructions on the packaging. It is really not that hard to mix those, believe me, I was a beginner once as well. Once you have your materials ready, it’s time to mix the chemicals. Safety is paramount during this step. Always wear gloves and work in a well-ventilated area. If you’re using a powder kit like the CineStill Film Cs41 Powder Developing Kit, you’ll need to dissolve the chemicals in water at the specified temperature.
Understanding the Timing for Each Step
Timing is critical in the development process. For C41 color film, the developer typically needs to be in contact with the film for 3.5 minutes at 102°F (39°C). Any deviation from this time or temperature can affect the color balance and density of your negatives.
To keep track of time, use a timer or a clock with a second hand. Start the timer as soon as you pour the developer into the tank, and be ready to pour it out the moment your time is up. Precision is key, so keep an eye on that clock!
Agitation Techniques: The Key to Even Development
Agitation is the process of gently moving the developing tank to ensure the chemicals flow evenly over the film, preventing underdevelopment or streaking. For consistent results, agitate the tank gently but firmly. Here’s a common method:
Invert the tank four times during the first 10 seconds.
Repeat this action for 10 seconds every 30 seconds for the remainder of the development time.
Consistency is crucial, so make sure you agitate the tank the same way each time.
Rinsing and Fixing: Finalizing the Film Development
After the development stage, it’s time to stop the developing action and fix the image onto the film. This is where the blix comes in – it’s a combination of bleach and fixer that stabilizes the image and makes it light-safe.
The Blix Process: What You Need to Know
The blix step typically takes around 8 minutes, but it’s essential to follow the instructions provided with your specific chemical kit. Just like with the developer, maintain the correct temperature and use consistent agitation to ensure the chemicals work effectively.
Rinsing Your Film: Techniques and Timing
After blixing, thoroughly rinse your film with water to remove all traces of chemicals. This step is usually done by filling and emptying the tank several times with clean water. Aim for a rinse time of at least 3 to 5 minutes to ensure your film is clean.
The Fixer: Ensuring Longevity of Your Negatives
Even though the blix contains a fixer, some photographers prefer to use a separate, dedicated fixer for added assurance. This step ensures that your images won’t degrade over time and is especially recommended if you’re planning to archive your negatives.
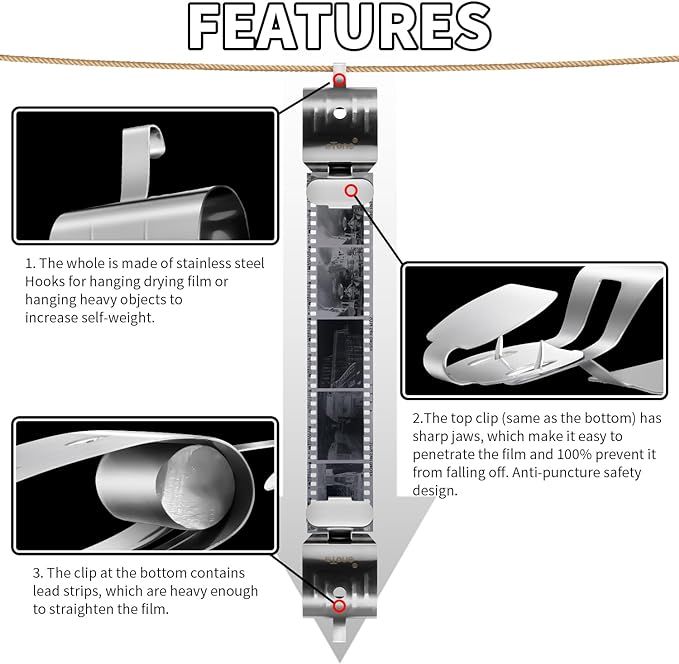
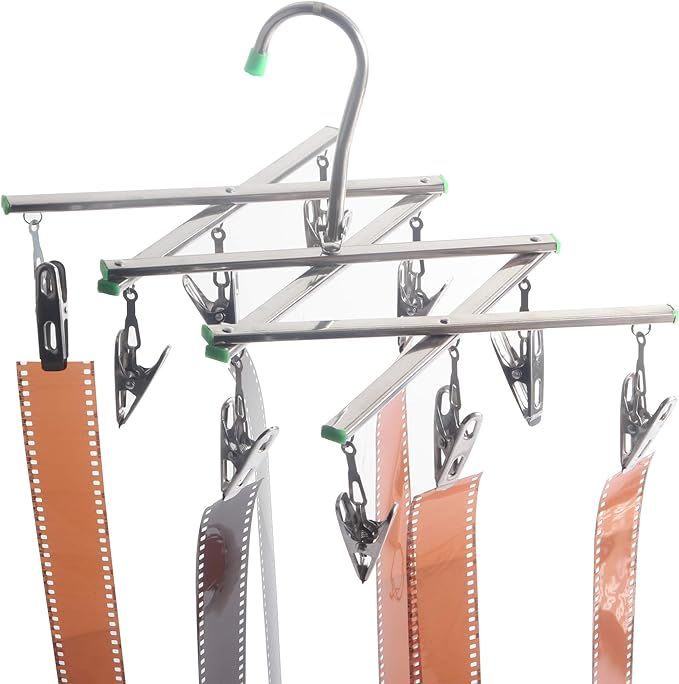
Drying and Cutting: Handling Your Negatives
Once the film is fully developed and rinsed, it’s time to dry it. Hang the film in a dust-free environment and avoid touching the negatives to prevent fingerprints and smudges. Use film clips to weigh down the bottom of the strips to prevent curling as they dry. If you notice dust on your negatives after they’ve dried, gently use a soft, anti-static brush for only $7.99 to remove it. I want to emphasize that investing in certain things may not be important, but these budget-friendly tools are essential for developing film negatives.
Get one for $8.99 https://amzn.to/4bssECx
Or get one for $16 here
When the film is completely dry, cut it into strips. Make sure your hands and scissors are clean to avoid damaging the negatives.
Handle your negatives by the edges to prevent any oils from your fingers from getting on the images. This is crucial because oils can attract dust and may affect scanning or printing quality.
Cutting and Storing Your Negatives
Once dry, cut your negatives into strips that fit your storage sleeves. Typically, 35mm film is cut into strips of six frames. Be precise with your cuts to ensure they’ll fit neatly into the sleeves and be easy to handle later on.
Get storage sleeves right here on amazon for $22.99
Common Mistakes and How to Avoid Them
Developing film at home can be tricky, and mistakes are part of the learning process. However, some common errors can be avoided with a bit of know-how.
Contamination Nightmares: Keeping Chemicals Separate
Always use separate containers for each chemical to avoid cross-contamination. Even a small amount of developer in your blix can ruin your film.
Over/Underdevelopment: Reading Your Results
If your negatives come out too dark or too light, it’s likely a result of over or underdevelopment. Pay close attention to your development times and temperatures to correct these issues.
Addressing Uneven Development Challenges
Uneven development can occur if the film isn’t agitated properly. Stick to a consistent agitation routine to ensure even development across the entire roll of film.
Troubleshooting: When Things Don’t Go As Planned
Even with careful preparation, sometimes the development process doesn’t go as expected. But don’t fret—most issues have simple solutions. Let’s walk through some common problems and how to resolve them.
One issue you might encounter is film that appears foggy or has an uneven tone after development. This could be due to light leaks in your developing tank or accidental exposure to light. Double-check that your tank is sealed correctly and that you’re working in complete darkness or using a reliable changing bag.
Dealing with Stuck Film on Reels
If you find that your film is sticking to the reels and won’t advance smoothly, it could be due to the reels being wet or the film being loaded improperly. To avoid this, always make sure your reels are completely dry before use. If the film is already stuck, gently rewind it slightly and try advancing it again, taking care not to touch the emulsion side of the film. For more detailed guidance, check out this beginner’s guide to developing color film.
Another tip is to practice loading a dummy roll of film in the light to get the hang of it. This way, you’ll be more confident when you do it for real in the dark.
Rescue Techniques for Overexposed Film
If you’ve overexposed your film, all is not lost. Overexposed negatives can often still yield images, albeit with reduced contrast and density. Scanning the overexposed film with a high-quality scanner can sometimes recover details in the highlights. Use photo editing software to adjust the exposure and contrast to salvage your images.
Correcting Color Shifts After Development
Color shifts in your negatives are usually due to incorrect development temperatures or times. Always double-check your chemical temperatures with a reliable thermometer and adhere strictly to the recommended development times. If you’ve already developed the film, you can often correct minor color shifts during the scanning process with color correction tools.

Pushing Boundaries: Advanced Techniques
Push processing involves developing the film for a longer time to compensate for underexposure, while pull processing involves a shorter development time for overexposed film. These techniques can alter the grain and contrast of your images, giving them a distinctive look.
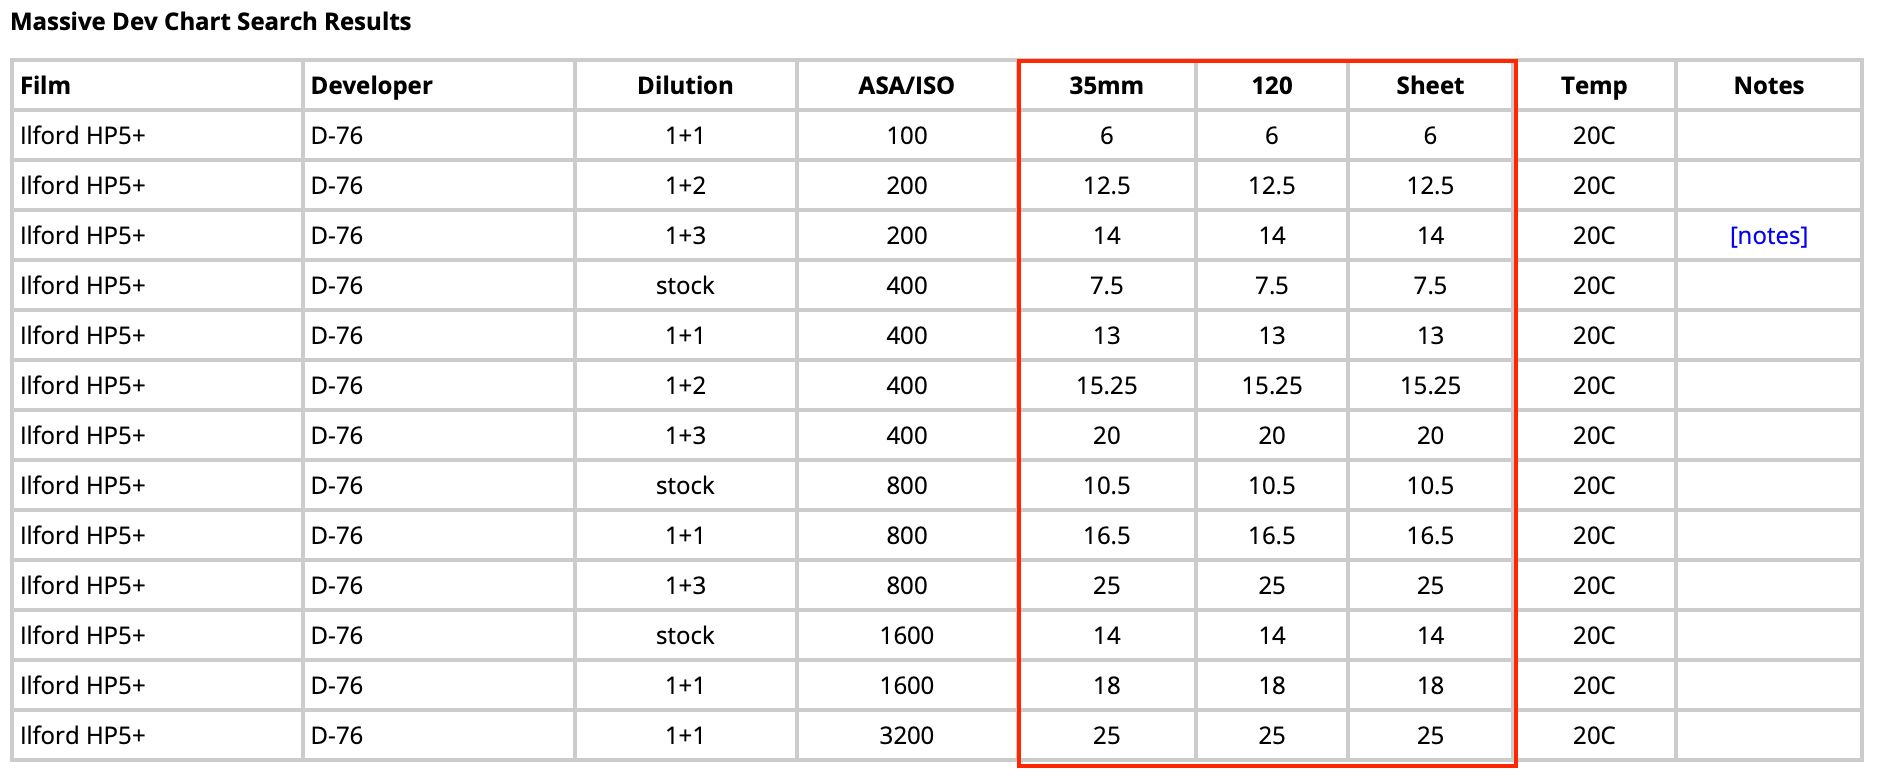
To push or pull process your film, you’ll need to adjust the development time according to how many stops you’re pushing or pulling. Consult a development chart or the Massive Dev Chart online for specific timing adjustments.
Cross Processing: A Creative Twist
Cross processing is when you develop film using a chemical process intended for a different type of film—like developing slide film (E6) in C41 chemicals. This can result in unusual colors and high contrast, perfect for an edgy, artistic effect. Just be aware that results can be unpredictable, so it’s best to try this with images you’re willing to experiment with.
Experimenting with Development Times for Unique Results
Altering the development times can also yield interesting results. For example, extending the development time can increase contrast and grain, while reducing it can create a softer, lower-contrast image. Always keep notes on your experiments so you can replicate or adjust the process in future rolls.
Watch this absolute best video that will go through step-by-step process
Frequently Asked Questions (FAQ)
How often can I reuse my chemicals?
Chemicals can be reused, but their effectiveness diminishes with each roll of film developed. The number of times you can reuse chemicals varies depending on the brand and type. As a general rule, liquid chemicals can usually process around 8 to 12 rolls of film before they need to be replaced. Always check the color and clarity of your chemicals before use; if they’re discolored or murky, it’s time for a fresh batch.
What is the difference between C41 and E6 processing?
C41 is the process for developing color negative film, while E6 is for developing slide (transparency) film. The chemicals and processing times differ between the two, and they are not interchangeable. C41 yields negatives for prints, and E6 produces slides for projection or scanning. To better understand these differences, you might want to explore the benefits and advantages of film photography.
Can I develop color film at room temperature?
Developing color film at room temperature is possible, but it requires adjustments to the development time. The standard temperature for C41 development is 102°F (39°C). If you choose to develop at a lower temperature, you’ll need to extend the development time, which can increase the risk of color shifts and uneven development.
How to tell if my chemicals have expired?
Chemicals that have changed color, developed a foul odor, or become cloudy are likely expired. Mixed chemicals have a limited shelf life, even when stored properly. If you’re unsure, it’s safer to mix a new batch rather than risk ruining your film with expired chemicals. For more insights on film development, check out our DIY guide & cost-saving tips on film development.
What should I do if the film is not fully developed?
If your film comes out looking faint or underdeveloped, it may be due to insufficient development time or low chemical temperatures. To prevent this, ensure your chemicals are at the right temperature and that you’re developing for the full recommended time. If the issue persists, it might be time to replace your chemicals.
Developing color film at home can be a fulfilling way to engage with the photographic process. With practice, patience, and a bit of experimentation, you’ll be able to produce beautiful, high-quality images right from the comfort of your own home. Remember to always prioritize safety when handling chemicals and enjoy the creative process that film photography brings.
Developing color film at home can be a rewarding experience, giving you more control over your photographic process and potentially saving money in the long run. For those new to this practice, it’s essential to understand the dynamic range in film photography, as it can greatly affect the outcome of your photos. With some basic equipment and chemicals, you can start developing your own color film with just a little practice.


Leave a Reply