Key Takeaways
Understanding how light meters work is crucial for achieving perfect exposure in film photography.
Incident light meters measure the light falling on the subject, while reflected light meters measure the light bouncing off the subject.
Choosing between handheld and in-camera light meters depends on your specific needs and shooting style.
Knowing how to use a light meter can greatly reduce film waste and ensure consistent results.
Alternative methods like light meter apps and the Sunny 16 rule can be useful in situations where a traditional light meter isn’t available.
Unlocking the Secrets of Light Meters
At its core, a light meter is a tool that measures the intensity of light in a scene. It helps you decide the optimal combination of shutter speed, aperture, and ISO – the trifecta that determines exposure.
Why Light Meters are Crucial for Film Photographers
Film is a medium with a limited dynamic range compared to digital sensors. This means that it’s less forgiving of exposure mistakes. Overexpose your film, and you’ll wash out the details; underexpose, and you’ll lose them in the shadows. This is why a light meter is not just a tool, but a trusted companion that ensures you nail the exposure every single time.
Overview of Incident and Reflected Light Measurements
There are two main types of light measurements: incident and reflected. Incident light meters read the light falling onto the subject. They are incredibly reliable because they’re not influenced by the subject’s color or texture. You simply hold the meter near the subject, and it tells you the exposure settings for the light that’s actually reaching your subject.

Reflected light meters, on the other hand, measure the light bouncing off the subject and back to the meter. This is what most in-camera meters do. While convenient, they can be tricked by very bright or very dark subjects, leading to over or underexposure. For a deeper understanding, you can read about how to use light meters in film photography on EMULSIVE.
Step-by-Step Process for Incident Light Metering
To effectively use an incident light meter, follow these steps:
Set your light meter to incident mode, if it’s not already set by default.
Place the meter’s white dome facing the camera, where it can receive the light that would fall on the subject.
Take the reading, which will display the correct aperture and shutter speed for the given ISO setting.
Adjust your camera settings accordingly, and you’re ready to capture the image with the right exposure.

Remember, incident metering is not influenced by the subject’s reflectivity, which means it’s often more accurate for determining optimal exposure.
Guideline for Reflected Light Metering
Reflected light metering requires a different approach. For more in-depth information, check out this comprehensive guide on how to use light meters in film photography.
Point your meter or camera at the subject from the shooting position.
Ensure the meter is set to reflected mode, then take the reading.
Apply the suggested settings to your camera, but be cautious if the subject has significant contrast or color variations.

Because reflected metering can be influenced by the subject’s brightness, you may need to compensate by overexposing for very dark subjects or underexposing for very bright ones. For more details on how these settings interact, refer to our comprehensive guide on aperture, depth of field, and shutter speed in film photography.
Advanced Light Meter Techniques
Technique involves using the meter to pre-visualize your image. By taking readings of different parts of your scene, you can imagine how each element will appear in the final photograph, allowing you to adjust your composition or lighting before taking the shot.
How to Translate Light Meter Readings into Creative Decisions
For example, if you want a moody image with deep shadows, you might choose to underexpose slightly. Conversely, for a high-key portrait with soft, bright tones, you might overexpose. Your light meter helps you to make these decisions with confidence.

Using the Zone System with Your Light Meter in Film Photography
The Zone System, developed by Ansel Adams, is a way to control and predict the exposure and development of your film. Here’s how you can apply it:
Visualize your scene in terms of zones from pure black to pure white, with varying shades of gray in between.
Use your light meter to take readings of the darkest and lightest parts of the scene you wish to capture detail in.
Place those readings into the zones where you want them to fall in the final image.
Adjust your exposure based on the zone you’ve placed your key subject in.
Develop your film according to the contrast you’ve pre-visualized.
By using the Zone System, you can achieve a level of precision in your exposures that brings your creative vision to life.
Benefits of Accurate Light Metering
Ensuring Consistent Exposure in Various Lighting Conditions
Whether you’re shooting in the soft light of dawn or the harsh midday sun, a light meter helps you maintain consistency across different lighting conditions. This consistency is key to developing a coherent body of work that stands out for its technical quality as well as its artistic vision.
Reducing Film Waste with Precise Exposure Settings
Film isn’t cheap, and every frame counts. By using a light meter, you significantly reduce the chance of over or underexposing your film, which can render it unusable. Accurate metering helps you get the most out of every roll, saving you money and frustration in the long run.
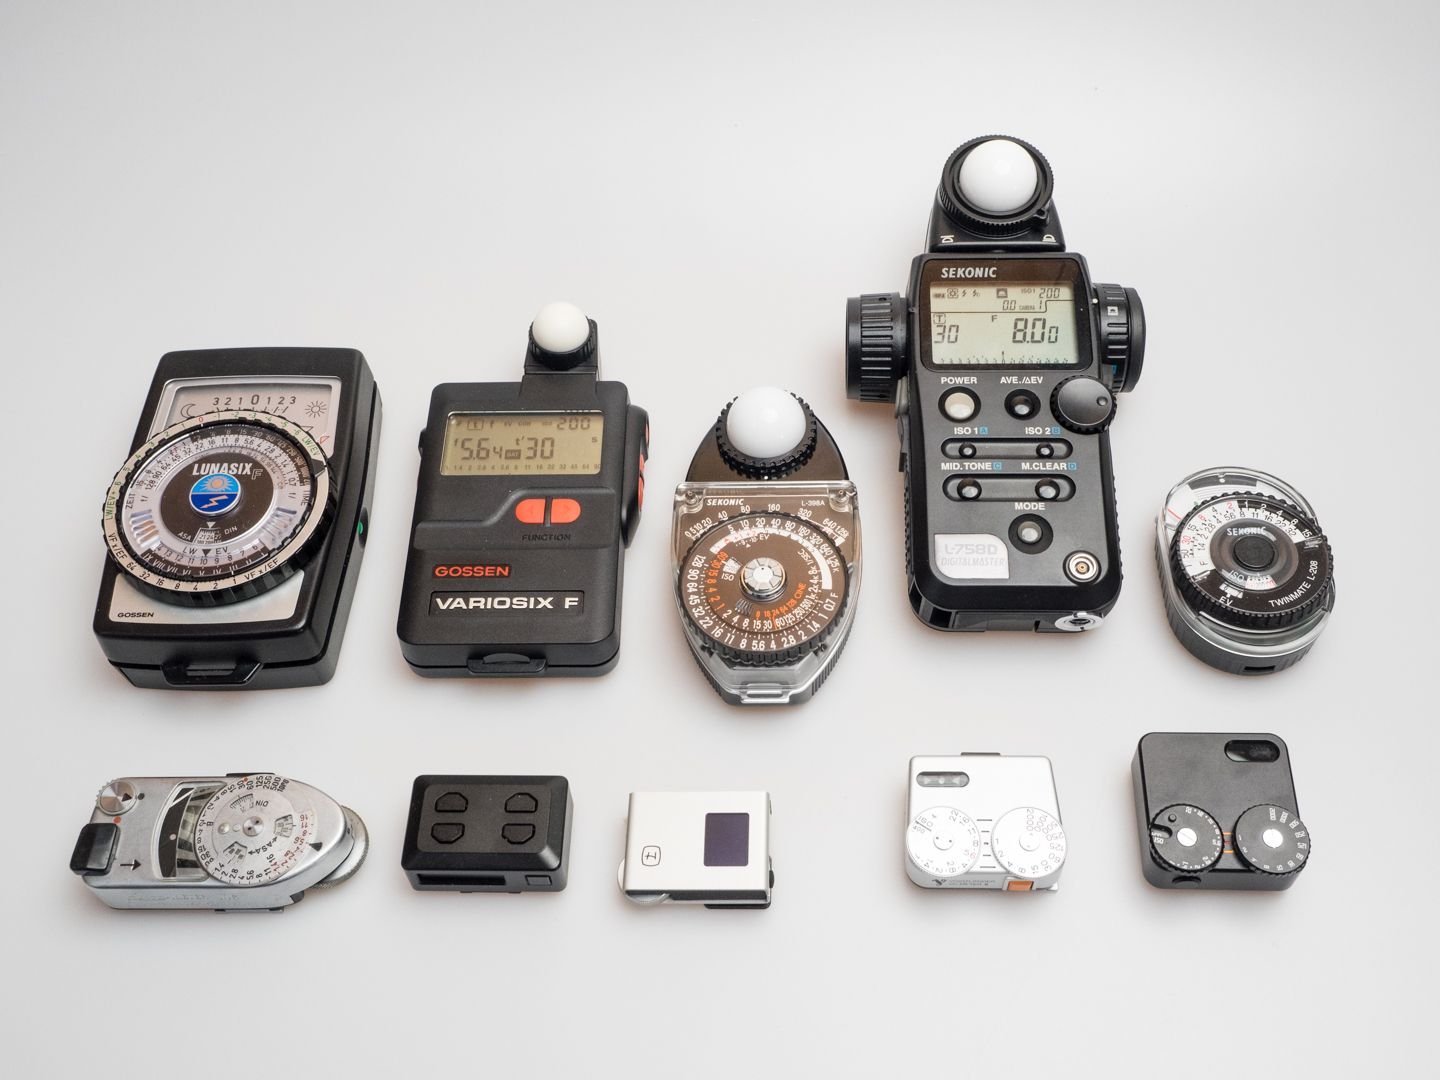
If you are wondering which one to buy you can read more about different types of meters here. Or just watch a YouTube video like

Hands-on Alternatives to a Light Meter
Sometimes, you might find yourself without a traditional light meter. But don’t worry, there are alternatives you can use to gauge the light:
Light meter apps: Many smartphone apps can provide a decent estimation of the correct exposure.
myLightMeter Pro, Lightme, Light Meter by WBPhoto, Photo Friend, Lumu Light Meter more about the apps here.
You can check out the video that talks about light meter apps and the results here.
The Sunny 16 rule: On a sunny day, setting your aperture to f/16 and your shutter speed to the reciprocal of your ISO gives you a good starting point for correct exposure.
Learning the Sunny 16 Rule and When to Apply It
The Sunny 16 rule is an age-old trick that’s especially handy when you’re out and about without a light meter. It goes like this: on a bright sunny day, set your aperture to f/16 and match your shutter speed to the reciprocal of your ISO. So if you’re shooting with ISO 100 film, your shutter speed should be 1/100th of a second. This rule gives you a good starting point for achieving a solid exposure under sunny conditions.
Of course, this is just a starting point. You’ll need to adjust if conditions change – say, if clouds roll in or you move into the shade. But it’s a useful guideline when shooting in consistent lighting, and it can help you understand the relationships between aperture, shutter speed, and ISO.
How Much Light Meters Cost?
You are probably wondering about the price of these meters. Well, the prices can go under $25 · $25 to $50 · $50 to $100 · $100 to $200 · $200 & Above. I recommend buying the used ones on eBay or Facebook Marketplace, because you can find a very good one for half a price.
Now if you are curious which meter you should choose, there is no better way to decide that that watching a short video here.

Frequently Asked Questions (FAQ)
How Do You Calibrate a Light Meter for Different Film Types?
Check the ISO/ASA rating of your film and set your light meter to match that sensitivity.
Test your meter against a known light source or a gray card to ensure it’s giving accurate readings.
Some films, especially black and white, may have a specific exposure index (EI) that differs slightly from the box speed. Adjust your meter accordingly if you’re pushing or pulling your film.
Calibration is key to getting consistent results, especially when you’re working with different types of film that may respond to light in unique ways. For a deeper understanding of exposure settings, consider exploring this comprehensive guide on aperture, depth of field, and shutter speed in film photography.
What Is the Difference Between Spot Metering and Incident Metering?
Spot metering is a type of reflected light metering that measures a very small area of the scene, typically 1-5% of the viewfinder area. It’s perfect for situations where you have a specific point of interest that you want to expose correctly, regardless of the rest of the scene. Incident metering, as mentioned earlier, measures the light falling on the subject rather than reflecting off it, providing a more general exposure setting that’s usually accurate regardless of the subject’s color or brightness.
Is There a Preferred Light Meter Brand for Film Photography?
While there’s no one-size-fits-all answer, brands like Sekonic and Gossen have earned a reputation for reliability and precision among film photographers. The Sekonic L-308X-U, for example, is popular for its ease of use and versatility. However, the best light meter for you will depend on your specific needs, budget, and the type of photography you do.


Leave a Reply