

Key Takeaways
DSLR scanning provides high resolution and flexibility, but it requires specific equipment like a macro lens and a stable copy stand.
Flatbed scanners are easier to use and ideal for larger formats, but they can be slower and less detailed than DSLR scans.
Initial costs for DSLR scanning can be high due to the need for specialized gear, while flatbed scanners have a lower upfront cost.
Consistent lighting is crucial for DSLR scanning; using a high-quality light box can make a significant difference.
Both methods have pros and cons; your choice depends on your specific needs, budget, and available space.
Intro
Scanning negatives at home allows you to have complete control over the digitization process. You can adjust settings to achieve the best possible quality, and it can be more cost-effective in the long run compared to sending your negatives to a lab. Most importantly, it offers the satisfaction of handling your own work, from shooting the film to seeing it in digital form.

Introduction to DSLR and Flatbed Techniques
What is DSLR Scanning?
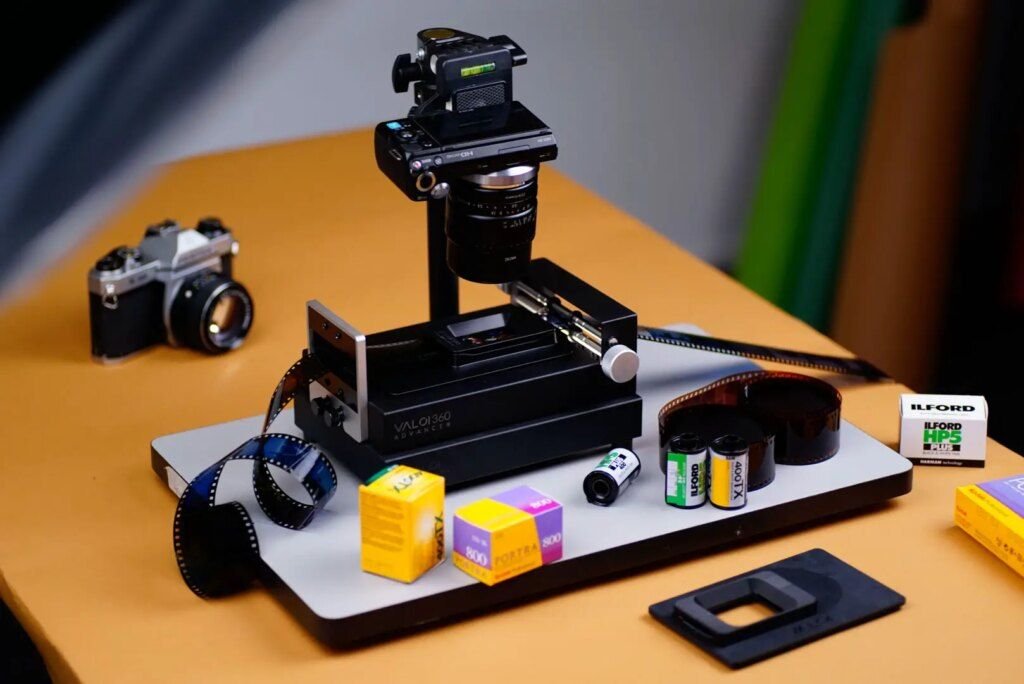
DSLR scanning is a method where you use a digital camera to capture high-resolution images of your negatives. This method comes with several benefits, such as high image quality and the flexibility to choose your resolution and file formats. However, this method requires a certain set of equipment and can take longer to set up.
Each of these components is vital for achieving high-quality scans. For example, a macro lens lets you capture the minute details of the negatives, and a light box ensures that the lighting is consistent and even. For more insights on film photography, check out this DIY guide on printing film photos.
What is Flatbed Scanning?
Flatbed scanners are versatile machines that can scan a range of materials, such as photos, documents, and negatives. They are typically more user-friendly and require less setup than DSLR scanning. Most flatbed scanners include film holders and specific software that can assist you in obtaining high-quality results with little effort.

Kit and Hidden Price
When deciding which technique to use, it’s crucial to consider the initial outlay and ongoing costs. Both techniques have their own sets of costs that can accumulate over time. For those looking to save, bulk film loading offers economical tips and techniques.
Comparing Initial Investments
DSLR scanning may require a hefty initial investment because it requires specific equipment. Here’s a general idea of what you might need to spend:
|
Product |
Approximate Price |
|---|---|
|
DSLR Camera |
$500 – $2000 |
|
$300 – $1000 | |
|
$50 – $200 | |
|
$20 – $100 | |
|
Copy Stand |
$100 – $300 |
DSLR Scanning
Light Box
When selecting a light box for DSLR scanning, find one that provides uniform lighting and a color temperature that is similar to daylight (around 5000K). Here are some options:
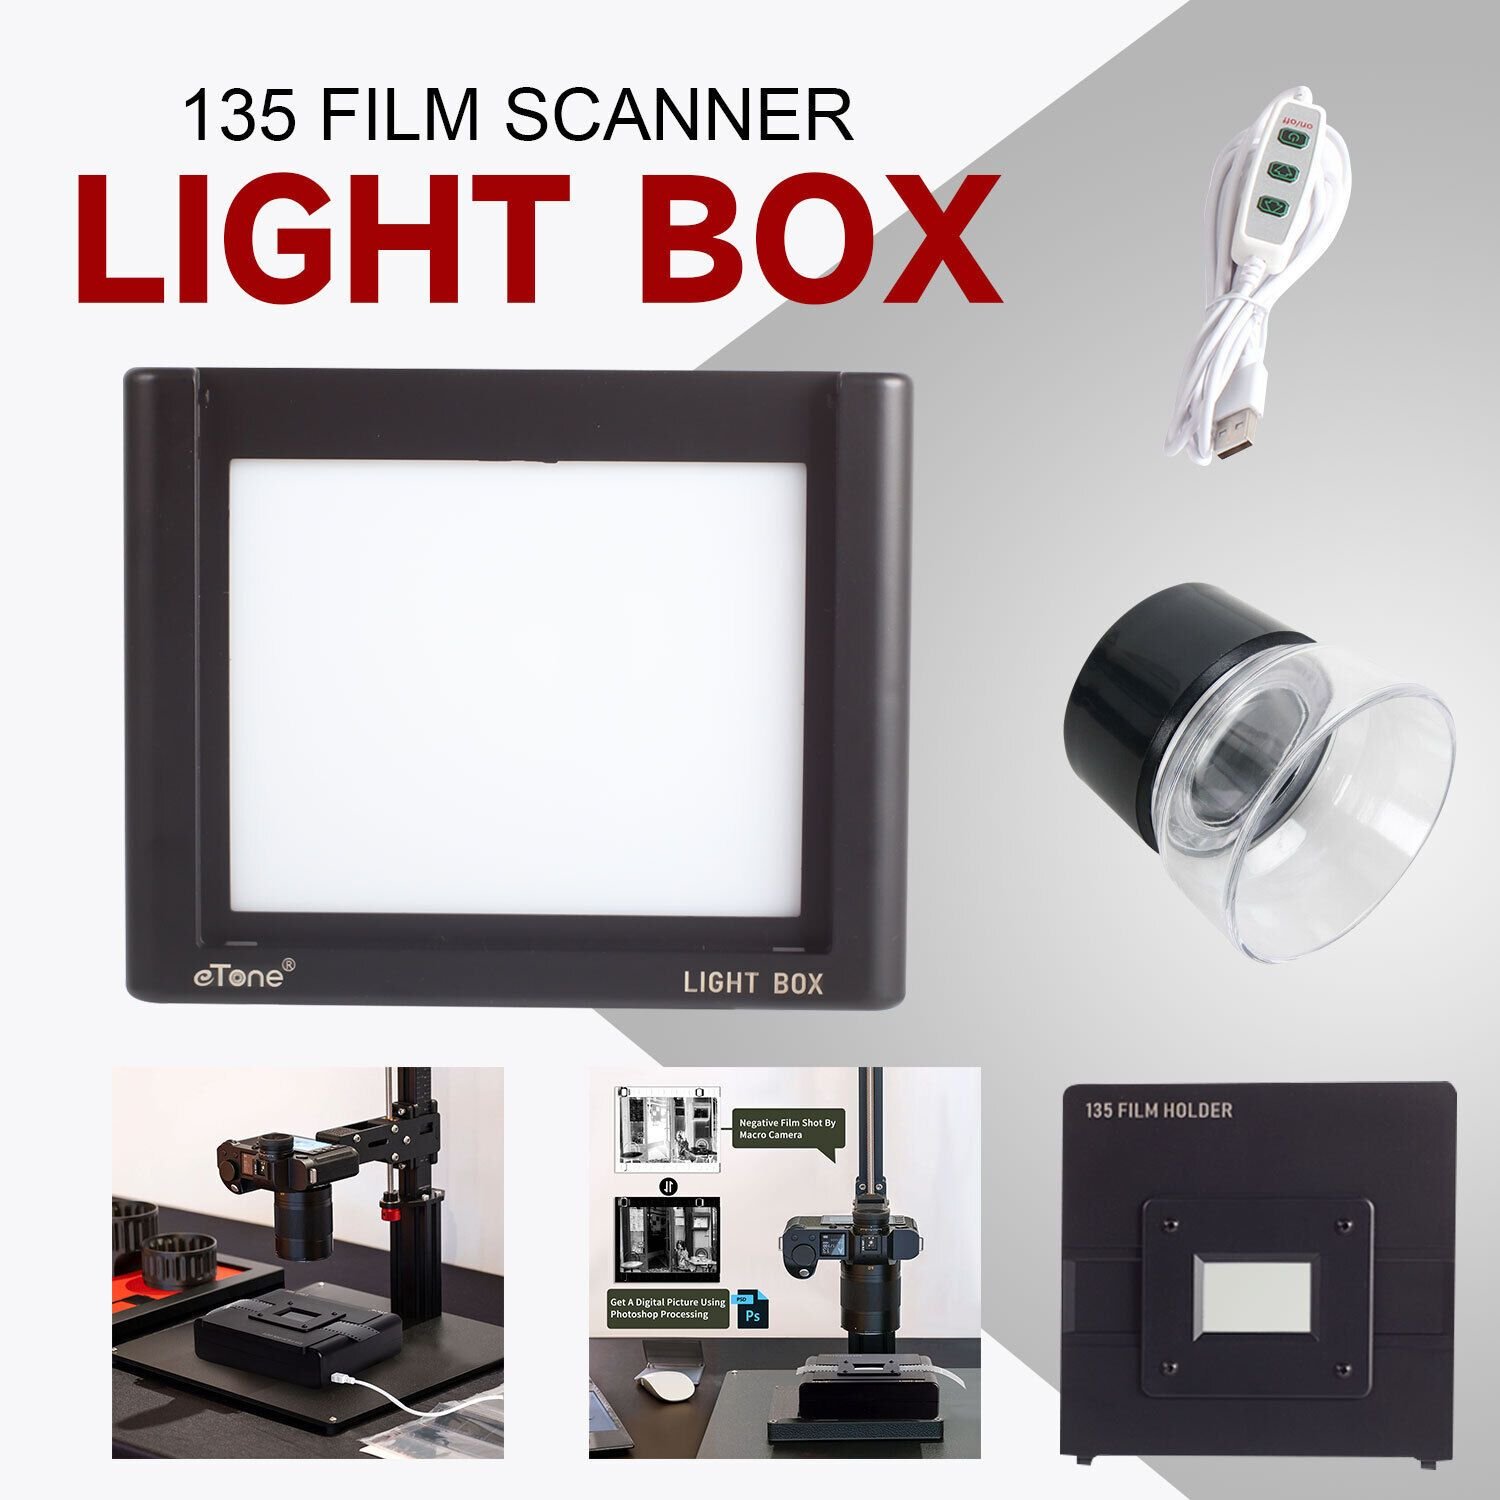
Kaiser Slimlite Plano: This light box is known for its even light distribution and slim design, making it perfect for scanning both 35mm and medium format negatives. $230
Huion L4S Light Pad: This is a budget-friendly option that still offers excellent brightness and consistency. $37
Artograph LightPad Series: These light pads come in various sizes and offer adjustable brightness, making them versatile for different scanning needs. From $80 – $260
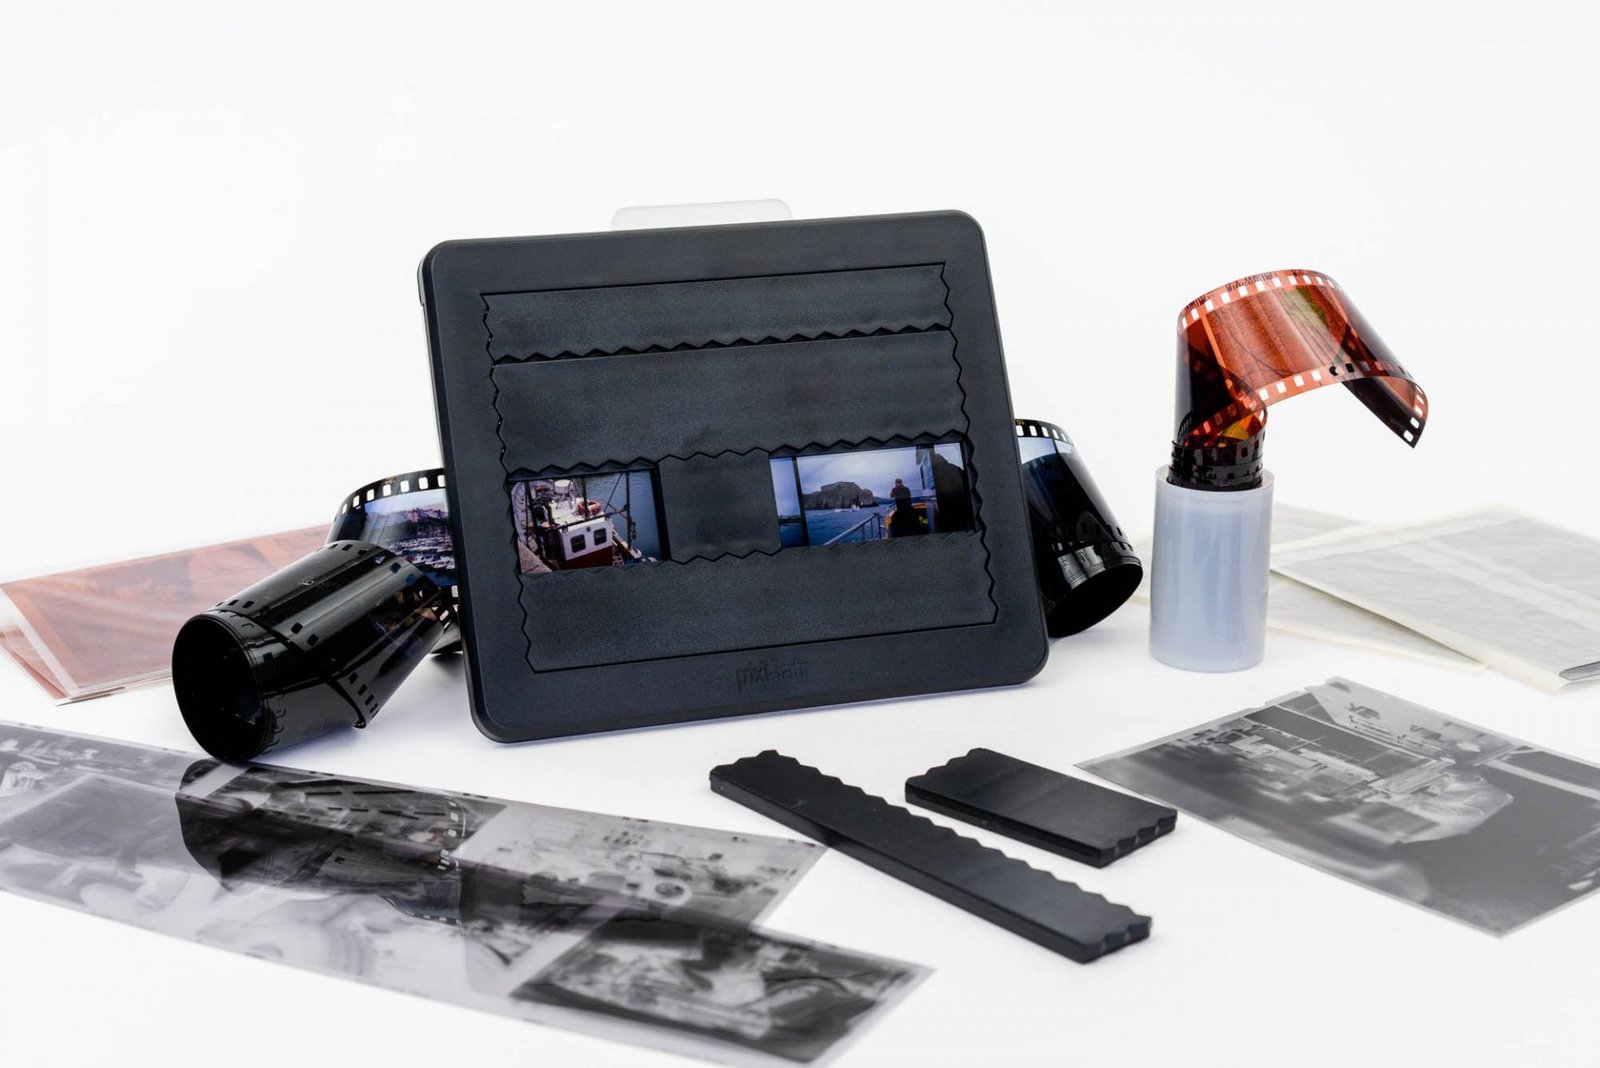
Pixl-latr for $54.99
Copy Stand
When scanning with a DSLR, a sturdy copy stand is a must. It keeps your camera still and lines it up with the film, so your scans aren’t blurry or skewed. You should be able to adjust the copy stand to get the camera at the right height and angle.
Copy Stands to Buy
Here are some of the top copy stands you can buy for DSLR scanning:
Kaiser RS 1 Copy Stand: This copy stand is a top choice for professional photographers due to its stability and precision. $499
ProMaster Copy Stand: $219
Flatbed Scanning
Many people prefer flatbed scanners for scanning negatives because they are easy to use and versatile. They can handle all kinds of materials, from photos to documents to film negatives. They may not be as detailed as DSLR scanning, but they are a practical and affordable choice for many photographers.
Flatbed scanners have a few key benefits, one of which is their capacity to scan larger formats, like 4×5 or 8×10 negatives. This makes them a top pick for photographers who use large format film. Moreover, flatbed scanners usually include film holders and specific software that makes scanning a breeze.
Top Flatbed Scanners for Negatives
When you’re in the market for a flatbed scanner for negatives, it’s important to think about things like resolution, user-friendliness, and software compatibility.
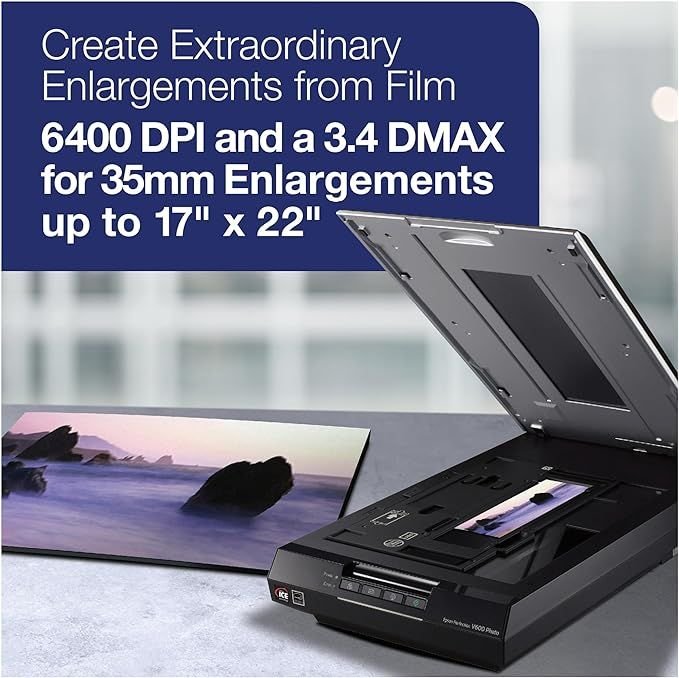
Epson Perfection V600: This scanner has a high resolution of 6400 dpi, which is perfect for scanning both 35mm and medium format negatives. It also includes Digital ICE technology that can eliminate dust and scratches from the scans. $329
Canon CanoScan 9000F Mark II: This scanner is popular among photographers because of its superb color accuracy and high resolution of 9600 dpi. It also comes with film holders for different formats and boasts quick scanning speeds. $499
Plustek OpticFilm 8200i SE: This isn’t your average flatbed scanner. The Plustek OpticFilm was made with the express purpose of scanning 35mm negatives and slides. It boasts a high resolution of 7200 dpi and comes with sophisticated software for improving image quality. $399
The Good and Bad of Flatbed Scanning
Like everything else, flatbed scanning has its ups and downs. Knowing what these are can help you figure out if it’s the right choice for you.
Advantages:
Flatbed scanners are usually simpler to install and operate than DSLR scanning.
Flatbed scanners can handle a variety of materials, such as photos, documents, and film negatives.
Flatbed scanners have a lower initial cost than DSLR scanning setups.
Flatbed scanners can easily handle larger formats like 4×5 or 8×10 negatives.
Cons:
Less Detail: Flatbed scanners may not pick up as much detail as DSLR scans.
Longer Scanning Times: It can take longer to scan with a flatbed scanner, especially for high-resolution scans.
Fewer Software Options: The software that comes with flatbed scanners may not give you as much control and customization as DSLR scanning software.
Final Thoughts
Both DSLR scanning and flatbed scanning have their pros and cons. Your decision will ultimately depend on your specific needs, budget, and the space you have available. DSLR scanning offers high resolution and flexibility, but it requires a significant upfront investment and specialized equipment. Flatbed scanners, on the other hand, are easier to use and more affordable, but they may not provide the same level of detail and control.
Once you know the ins and outs of both methods, you can make a choice that works best for your photography. Whether you go for DSLR scanning or flatbed scanning, both ways will let you turn your film negatives into digital and keep your memories safe for a long time.
Final Tips for Getting the Most Out of Your Scans
No matter which method you decide to use, here are some final tips to help you get the most out of your scans:
Keep Your Negatives Clean: Dust and scratches can have a negative impact on the quality of your scans. Use a soft brush or compressed air to clean your negatives before scanning.
Regularly Calibrate Your Equipment: Make sure to calibrate your scanner or camera regularly to ensure accurate color reproduction and optimal performance.
Invest in High-Quality Software: Spend money on good scanning software that offers advanced features and controls. This can significantly improve the quality of your scans.
Don’t Be Afraid to Experiment with Settings: Feel free to experiment with different settings to achieve the best results. Adjust the resolution, exposure, and color balance to find what works best for your negatives.
Frequently Asked Questions
What’s the Best Method to Scan 35mm Negatives?
The best method to scan 35mm negatives depends on your specific needs and budget. If you require high-resolution scans and have the necessary equipment, DSLR scanning is a great choice.
Can I Use a Regular Scanner for Scanning Negatives?
While you can use a regular scanner for scanning negatives, the results may not be as good as those obtained with a scanner specifically designed for this purpose. Regular scanners are not designed to handle the fine detail and color accuracy required for negative scanning. A flatbed scanner with film holders or a dedicated film scanner is a better choice.
What’s the Ideal Resolution for Scanning Negatives?
The resolution you opt for hinges on what you plan to do with the scanned images. For everyday use, a resolution of 2400 dpi should do the trick. If you’re planning on making large prints or require top-notch scans, you might want to think about using a resolution of 4800 dpi or more.
What’s the best way to get rid of dust and scratches on my scans?
For getting rid of dust and scratches on scans, try using a soft brush or compressed air to clean your negatives before you start scanning. Plus, a lot of scanners come with software features like Digital ICE that can automatically get rid of dust and scratches while you’re scanning.
Do Color and Black & White Negatives Scan Differently?
Indeed, color and black & white negatives do scan differently. Color negatives necessitate more accurate color calibration and can gain from using sophisticated software like Negative Lab Pro. Black & white negatives are typically simpler to scan and demand less post-processing. Nevertheless, both kinds of negatives can be effectively scanned with either DSLR or flatbed scanning techniques.


Leave a Reply