Key Insights on Vignetting in Film Photography
Vignetting is the effect where the corners of a photo are darker than the center, often used for a creative or dramatic impact.
There are several types of vignetting, including natural, mechanical, and software-induced.
Certain camera settings and equipment can either minimize or enhance vignetting, depending on the desired outcome.
Creative use of vignetting can help focus the viewer’s attention on the subject and add depth to the composition.
Understanding when and how to use vignetting will significantly impact the aesthetic quality of your photographs.
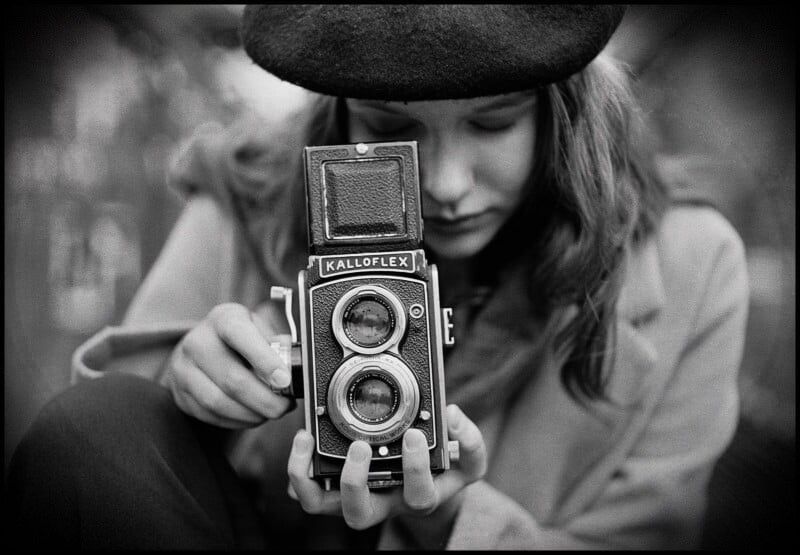
Photo by https://petapixel.com/
Defining Vignetting in Visual Terms
Vignetting happens when the edges, especially the corners, of your photo are darker than the middle. Why does this matter? Because it’s all about where your viewer’s attention goes. With a little vignetting, you can guide their gaze exactly where you want it.
Historical Use of Vignetting in Classic Photography
Once upon a time, vignetting wasn’t a choice—it was just what happened with old cameras and lenses. But photographers noticed something: it looked pretty good. So, they kept it up, using vignetting to make their subjects stand out.
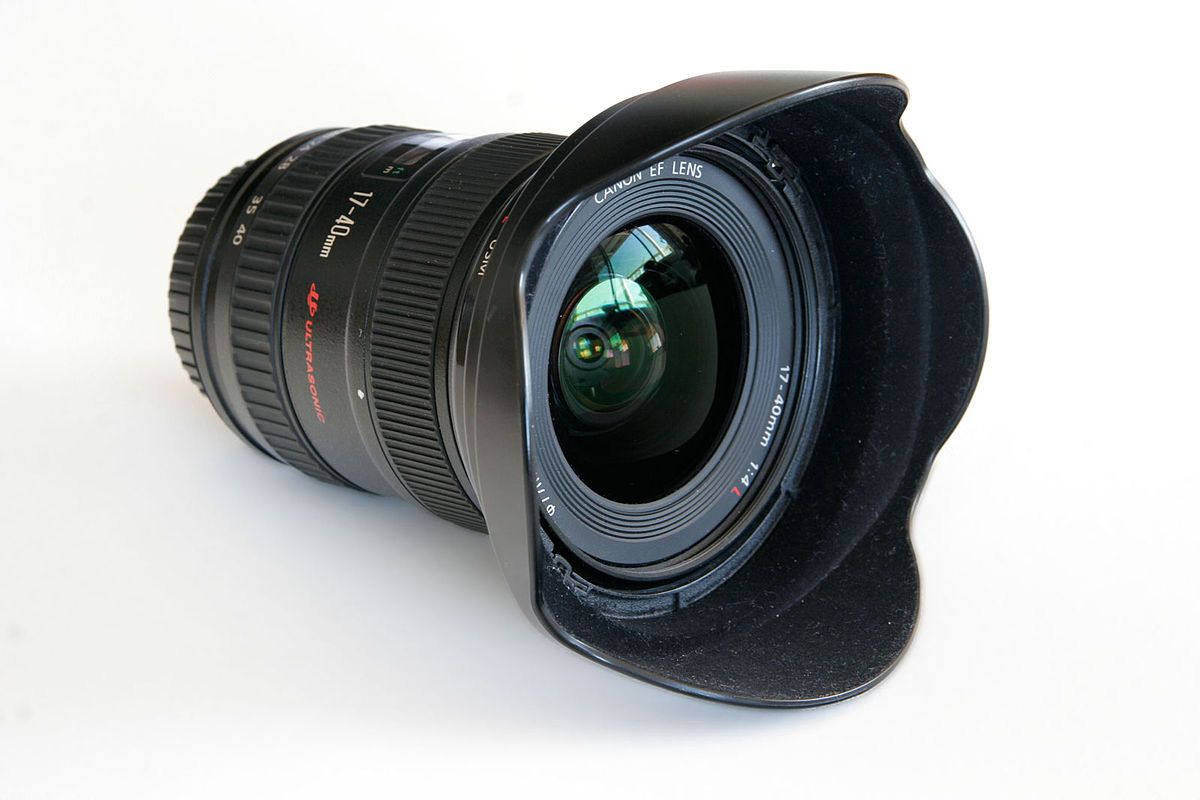
Identifying the Causes of Vignetting
Why do your photos have those shadowy corners? It could be the lens or even the way light plays in your camera. Sometimes, it’s because of what you’ve added to your lens, like a filter or a hood. But don’t worry, understanding these causes means you’re already on your way to controlling them.
Optical Effects Within the Lens
Think of your lens as a tunnel. If the tunnel is wide, light spreads out evenly. But if it’s narrow, light can’t reach the edges as well. That’s optical vignetting. It’s most common when you’re shooting wide open—that means using a big aperture like f/2.8.
External Influences on Film Exposure
Besides that, there’s stuff outside your camera that can cause vignetting. Ever put on a thick filter or a lens hood that’s just too big? They can block some of the light, leaving you with those darker corners. It’s like wearing sunglasses that are too big for your face.
Photo by https://www.reddit.com/r/cinematography/
Embracing or Avoiding Vignetting: Techniques and Tips
Adjusting Camera Settings for Desired Effects
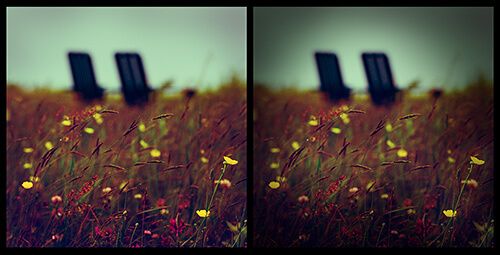
First things first: let’s set the stage right inside your camera. If you’re after that vignette vibe, start by opening up your aperture. Remember, a lower f-number means a wider aperture and a stronger vignette effect. It’s like squinting your eyes – the center stays bright, but the edges go dark.
But what if you want to avoid vignetting? Easy. Just close down that aperture. Go for a higher f-number, and you’ll see those corners brighten up. It’s all about finding the sweet spot for the look you’re going for.
Example: Shooting a portrait at f/2.8 may produce a soft vignette, which can help focus attention on the person’s face. On the other hand, shooting a landscape at f/11 will likely result in an evenly lit image with minimal vignetting.
It’s not just about the aperture, though. The lens you choose plays a big part. Wide-angle lenses are famous for their vignetting, especially at those wider apertures. So, if you’re looking to avoid it, you might want to reach for a different lens.
Creative Use of Vignetting in Composition
Vignetting is also a tool you can use to tell a story. Want to make your subject the star? Add a vignette. It can help eliminate distractions, focusing all the attention where you want it.
Vignetted Visions
Classic Portraiture: Enhancing Subject Focus
Take classic portraiture, for example. Vignetting can be the difference between a flat, lifeless image and one where the subject practically leaps off the page. It’s all about using those shadows to frame their face, highlighting their features and expressions.
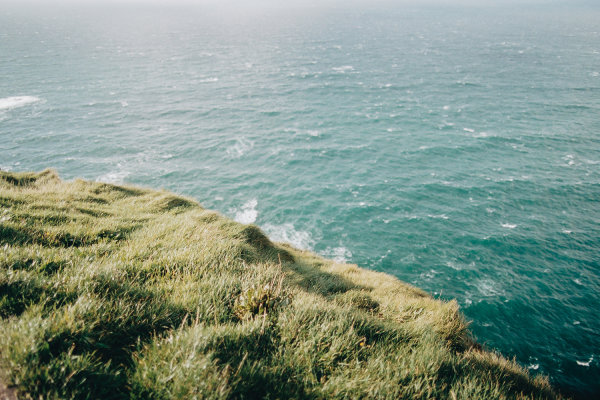
Landscape Wonders: Adding Depth and Drama
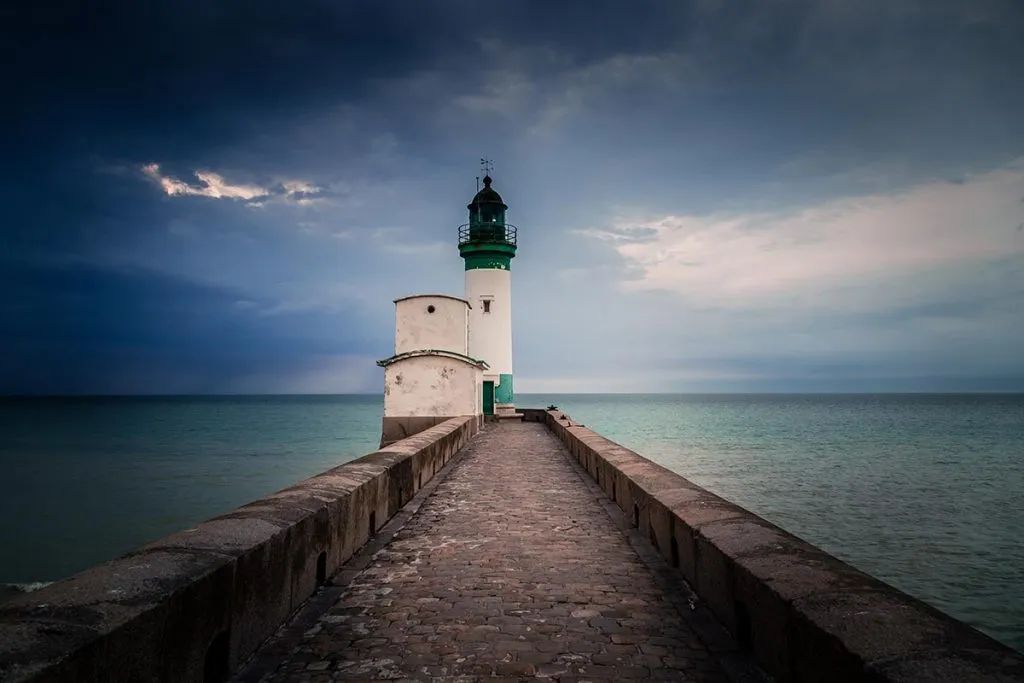
Photo by Adrien Tutin on Unsplash
Then there’s the great outdoors. Landscapes can go from “nice” to “frame-worthy” with a touch of vignetting. It adds depth, guiding the viewer’s eye from the darkened edges to the bright center, making everything more dramatic.
Picture a mountain scene: the peaks might be the highlight, but the vignette can make them even more majestic.
Or a sunset: the colors are beautiful on their own, but add a vignette, and it’s like the sky’s putting on a show just for you.
Final Frame: Mastering the Vignette
In the end, mastering vignetting is all about practice. Try it out, see what works, and don’t be afraid to experiment with a lens hood. Every photo is a chance to play with light and shadow, to shape how others see the world through your lens.
And there you have it. Vignetting can be your secret weapon or a subtle touch that elevates your photography. It’s all in how you use it. So go ahead, give it a shot. Your next photo could be the one that takes everyone’s breath away. For more insights, check out this guide on mastering the art of vignetting.
Vignetting can add a dramatic effect and draw attention to the subject in the center of the frame.
You can control vignetting through lens choice, aperture settings, and post-processing techniques.
Vignetting can be both a natural byproduct of the lens and camera setup or an intentional creative choice.
While some photographers may consider vignetting a flaw, others embrace it for its artistic value.
Understanding when and how to use vignetting will enhance your skills and expand your creative vision in photography.
Remember, photography is about vision and expression. Vignetting is not just a technical consideration; it’s a way to add mood, focus, and narrative to your images. As you continue to explore the world through your lens, consider how vignetting can play a role in your storytelling. With each shot, you have the opportunity to create something truly unique and impactful. So go out there, experiment with light and shadows, and let vignetting be a part of your photographic journey.
Frequently Asked Questions
Can Vignetting Be Fixed in Post-Processing?
Absolutely! If vignetting isn’t what you were going for, you can fix it in post-processing. Programs like Adobe Lightroom and Photoshop have dedicated tools for this. Just a few clicks can brighten up those corners and give you a more even exposure across the frame. It’s like having an eraser for shadows.
On the flip side, if you want to add vignetting, these programs have you covered as well. You can control the amount, midpoint, and even the roundness of the vignette. It’s a simple way to add a professional touch to your photos.
Is Vignetting Considered a Flaw or Feature in Photography?
This is a bit like asking if the glass is half empty or half full. Vignetting can be seen as a flaw if it’s unintentional and detracts from the image. But, when used deliberately, it’s definitely a feature—a creative tool that can enhance your photo’s composition and mood. It all depends on your artistic intent.
The key is to be intentional. If you’re going for a vintage or moody look, vignetting can be your best friend. But if you’re after crystal-clear edge-to-edge sharpness, you’ll want to minimize it.
Do All Lenses Cause Vignetting?
Not all lenses are created equal when it comes to vignetting. Some are more prone to it, especially wide-angle and fast lenses when used at wide apertures. But many modern lenses are designed to minimize this effect. It’s a matter of choosing the right tool for the job.
If you’re looking to avoid vignetting, do a little research before you buy a lens. Check out lens hood benefits and sample images to see how it performs. And remember, stopping down your aperture can also help reduce vignetting, regardless of the lens.
Does Film Type Affect the Vignetting Effect?
Film type itself doesn’t directly cause vignetting, but the camera and lens you use to shoot that film certainly can. However, the characteristics of the film, like its dynamic range, can influence how noticeable the vignetting is in your final image. High-contrast film, for instance, might make those darker corners stand out more.
When you’re shooting film, it’s always good to be aware of how your equipment interacts with light. That way, you can anticipate the vignette effect and use it to your advantage—or avoid it if that’s your goal.


Leave a Reply